Saturday, 28 February 2009

0 Chocolate Valentino

cv_main


Our wonderful co-hosts Dharm and Wendy gave us an easy and delicious flourless chocolate cake recipe called "Chocolate Valentino" for this month's Daring Bakers' challenge, but they also asked us to pair it with a homemade ice cream. Even though the challenge recipe was one of the easiest Daring Bakers' recipes we've had to date, I had to turn to Ben and Jerry for help with the second part of the challenge. It's been about 9 or 10 years since I've made my own ice cream and my ice cream machine was not stored in my garage as I originally thought, but actually stored at my parents' house. So my apologizes to Wendy and Dharm for failing the ice cream part of the challenge.

db_pink


The "Chocolate Valentino" recipe comes from Chef Wan, Malaysia's eccentric rock star chef and food ambassador. It simply contains chocolate, butter and eggs. I don't think a cake can get much easier than that. Because there is nothing to hide behind, the cake will taste only as good as the chocolate used, so I used my favorite brand for baking - Valrhona. I used a 70% cacao chocolate because I didn’t want the cake to be too bittersweet. Also, less cacao means more sugar and more sugar means more moisture added to the cake.

The batter was a breeze to whip up. Like with most flourless chocolate cake batters, the most technical part was making sure the egg whites were not over beatened. They should be beaten to stiff peaks but not dry (they should still be shiny and glossy). At this stage, the egg whites will provide the maximum expansion for a souffle-like result and excellent moisture inside when baked. Over beaten whites will make the cake dry. Of course folding the beaten whites into the chocolate-yolk mixture with minimal deflation is also key. You want to maintain the air you worked so hard to achieve. Deflated egg whites will give you a flat cake.

cv_baked

soufflé-like


I divided the recipe into 3/5 which was the perfect amount to fill three heart shaped ramekins. It was also easy to divide the recipe into 3/5 since the original recipe called for 5 eggs. The cakes puffed up and then settled down a bit while they cooled, leaving a nice crust. I must say that they turned out great. It was melt-in-your-mouth tender and so delicious when paired with the ice cream.

cv_crumb

it melts in your mouth


Chocolate Valentino

Ingredients:
16 ounces (1 pound) (454 grams) of semisweet chocolate, roughly chopped
½ cup (1 stick) plus 2 tablespoons (146 grams total) of unsalted butter
5 large eggs separated

Note: For a real Valentino, bake it in a heart shaped pan or cut it out into a heart shape. You may use any shape pan that gives you an area of 50” - 6x8 or 7x7. An 8” spring form pan works with great results as do smaller pans or ramekins.

1. Put chocolate and butter in a heatproof bowl and set over a pan of simmering water (the bottom of the bowl should not touch the water) and melt, stirring often.
2. While your chocolate butter mixture is cooling. Butter your pan and line with a parchment circle then butter the parchment.
3. Separate the egg yolks from the egg whites and put into two medium/large bowls.
4. Whip the egg whites in a medium/large grease free bowl until stiff peaks are formed (do not over-whip or the cake will be dry).
5. With the same beater beat the egg yolks together.
6. Add the egg yolks to the cooled chocolate.
7. Fold in 1/3 of the egg whites into the chocolate mixture and follow with remaining 2/3rds. Fold until no white remains without deflating the batter.
8. Pour batter into prepared pan, the batter should fill the pan 3/4 of the way full, and bake at 375F/190C.
9. Bake for 25 minutes until an instant read thermometer reads 140F/60C. (Note – If you do not have an instant read thermometer, the top of the cake will look similar to a brownie and a cake tester will appear wet.)
10. Cool cake on a rack for 10 minutes then unmold.

The fine print:
The February 2009 challenge is hosted by Wendy of WMPE's blog and Dharm of Dad ~ Baker & Chef. We have chosen a Chocolate Valentino cake by Chef Wan; a Vanilla Ice Cream recipe from Dharm and a Vanilla Ice Cream recipe from Wendy as the challenge.

My 3/5 recipe ingredients:
9.6 oz (273 g) chocolate
3 oz (6 tbsp/87.6g) unsalted butter
3 large eggs, separated


cv_ic

Ben and Jerry's pistachio ice cream to the rescue

Sunday, 22 February 2009

0 Not My Grandmother's Chocolate Cake

of_choc_cake_sl


This is the very first chocolate layer cake I've ever made. To me chocolate layer cake is a very "American" cake. The kind of cake grandmothers all over the country have made using family recipes that have been passed down from generation to generation. I imagine that every family has their own version. But my family doesn’t since my parents are immigrants and I am a first generation American. My family has amazing recipes for dumplings, soups, Chinese tamales (zong zi) and New Year's cake (nian gao), but we have nothing for chocolate cake.

I wasn't sure if I was going to like this chocolate cake from Ina Garten's "Barefoot Contessa at Home" since I find most American-style frosted layer cakes too sweet. Well, it's mainly the frosting that I find too sweet. But it looked so good when she made it on her television show that I had to try it myself.

of_choc_cake_cut


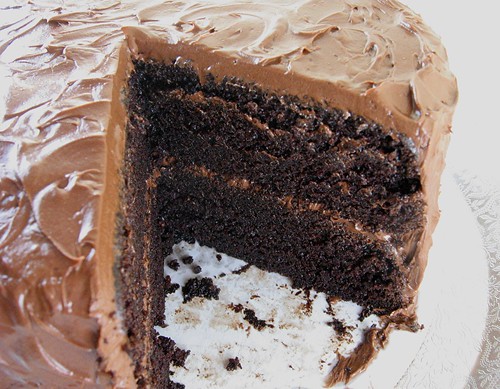
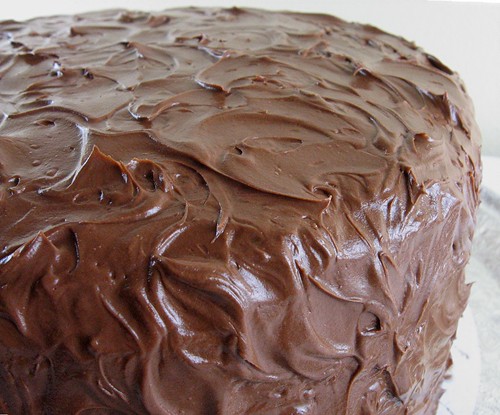
The cake is basically a one bowl chocolate cake. Put all the dry ingredients in a big bowl and mix in all the wet ingredients. Just like Ina says on her show "How easy is that?". The cake is dark and moist with the coffee adding a subtle flavor that really enhances the chocolate. The frosting is a very basic butter frosting. Cream some softened butter in a bowl, add a little bit of powdered sugar, and then add some melted chocolate. I like to use a bittersweet chocolate (like 70-85% cacao) so that the frosting isn’t overly sweet. The frosting is smooth and satiny. It's easy to spread on the cake layers without making a gloppy mess.

I was pleasantly surprised by how much I liked the cake and the frosting. In fact, I liked this cake so much that I've made it three times this month - twice as a layer cake and once as cupcakes. This tasted exactly like what I imagine an American chocolate cake should taste like. A co-worker told me that my cake looked so perfect that it couldn't be real. Not perfect as in precise or elegant, but perfect as in exactly how an old fashioned chocolate cake is supposed to look. Now that's the biggest compliment this first generation girl could hope to receive.

of_choc_cake_fr


Chocolate Cake
(Adapted from Ina Garten's "Barefoot Contessa at Home")

1 3/4 cups all-purpose flour
2 cups granulated sugar
3/4 cup Dutch-processed cocoa powder
2 teaspoons baking soda
1 teaspoon baking powder
1 teaspoon kosher salt
1 cup buttermilk, shaken
1/2 cup vegetable oil
2 extra large eggs, at room temperature
1 teaspoon pure vanilla extract
1 cup freshly brewed hot coffee (or hot water)
Chocolate Frosting (see recipe below)

Preheat oven to 350F. Butter two 8-inch round cake pans. Line with parchment paper, then butter and flour the pans.

Sift the flour, sugar, cocoa, baking soda, baking powder, and salt into bowl of a stand mixer fitted with a paddle attachment. Mix on low speed to combine the ingredients. In another bowl, gently whisk together the buttermilk, oil, eggs and vanilla extract. With the mixer on low speed, slowly add the wet ingredients to the dry ingredients and mix to combine.

With the mixer still on low speed, add the coffee and stir just to combine. (I like to cover the stand mixer with a large dish towel since the coffee might splash.) Remove bowl from mixer. Scrape the bottom of the bowl with a rubber spatula to make sure everything is well combined.

Pour batter into prepared pans and bake for 35 to 40 minutes, until a cake tester comes out clean. Cool in the pans for 30 minutes, then turn them out onto a cooling rack and cool completely.

Place one layer, flat side up, on a flat plate or cake pedestal. With a knife or offset spatula, spread the top with frosting. Place the second layer on top, rounded side up, and spread the frosting evenly on the top and sides of the cake.

Chocolate Frosting

6 ounces semi or bittersweet chocolate (I like using 70-85% cacao)
8 ounces (2 sticks) unsalted butter, at room temperature
1 teaspoon pure vanilla extract
1 1/4 cups confectioners' sugar, sifted
1 tablespoon instant coffee or espresso powder
2 teaspoons hot water

Chop the chocolate and place in a heatproof bowl. Set the bowl over a pot of simmering water and stir chocolate until just melted. Set chocolate aside to cool to room temperature but still melted.

In the bowl of a stand mixer with the paddle attachment, beat butter on medium speed until light and fluffy, about 3 minutes. Add vanilla extract and continue beating for 1 more minute. With the mixer on low speed, slowly add the confectioners' sugar. Increase speed to medium and beat until smooth and creamy, scraping down the sides of the bowl as necessary.

Dissolve the coffee/espresso powder in the hot water. With the mixer on low speed, add the melted chocolate and dissolved coffee/espresso to the butter mixture and mix until blended. Don't whip. Spread immediately on the cooled cake.

(Note: Ina's recipe uses 1 raw egg yolk in the frosting, but I decided to leave it out of my frosting.)

Sunday, 15 February 2009

0 healthy blueberry clafouti


my Valentine treat...

BLUEBERRY CLAFOUTI...
my HEALTHY VERSION..


sugar free and low carb. i used almond flour, baking splenda and yolk-eggbeaters....i think i i liked it better that the real one...yummy breakfast treat !

0 cinnamon pecan pinwheels


CINNAMON PECAN PINWHEELS...

0 bluberry clafouti


Dad's Valentine card

BLUEBERRY CLAFOUTI

this one was full fat, full carb...full GOOD !

0 my first ever! flourless chocolate cake

Mom's Valentine card
FLOURLESS CHOCOLATE CAKE
DARK CHOCOLATE WAFERS w/MILK CHOCOLATE FILLING


DARK CHOCOLATE COOKIES starting with Martha Stewart's recipe...i used whole wheat flour instead and they came out great.

Sunday, 8 February 2009

0 Velvet Kisses

velvetkiss


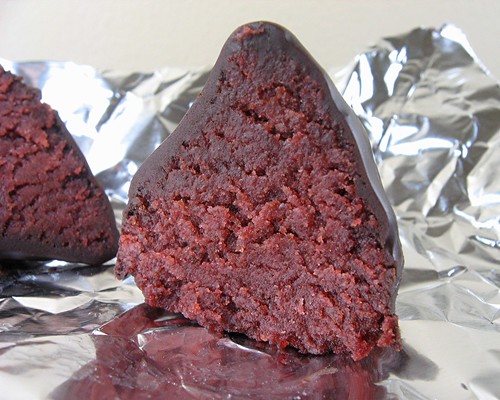
Valentine's Day and chocolate seem to go hand in hand. But during the past few years I associated Valentine's Day with red velvet cake too. It must have something to do with the red. So when I saw Angela combine the two into a "kiss" I knew exactly what I would be making this weekend. It's such a cute idea to make red velvet cake kisses covered with chocolate. (For those who don't know, they are inspired by Hershey's Kisses candy.)

I started with a red velvet cake recipe (which I adapted from Martha Stewart's site). I prefer my cake without a lot of food coloring so I guess it's more like mahogany velvet than red velvet. When the cake was cool, I broke the cake into crumbs. Then I bound the crumbs with a cream cheese frosting and formed the "kisses". After letting them chill in the refrigerator, I glazed them with a chocolate ganache.

I have to be honest and tell you that I felt like I had made a big mistake by making these kisses. It felt wrong to break up the cake into crumbs. It felt just as wrong to mush up the cake crumbs with frosting. And it was definitely wrong to handle any food so much. When I tasted the mixture before forming the kisses, I was pretty disappointed with the texture and taste. But I couldn't do anything about it so I forged ahead and continued as planned. I shaped the crumb mixture into kisses and let them sit in the refrigerator overnight.

velvetkiss_sh

velvetkiss_g1


The next day I made the glaze and proceeded to coat my kisses. When the glaze had set, I tried one and I no longer felt that it was all a big mistake. The cake was super moist, but not mushy, and they were dense without any toughness. I've always felt that red velvet cake didn’t have a dominant flavor (very light cocoa would be the best way to describe the flavor). I feared that the chocolate glaze would completely overshadow the delicate cocoa-ness of the cake, but the chocolate glaze really complemented the cake and actually brought out the cocoa in the cake. Overall I was pretty happy that it worked out so well.

velvetkiss_c


Red Velvet Cake

1 1/4 cups all-purpose flour
2 tbsp unsweetened cocoa powder (natural not Dutch processed)
3/4 tsp baking soda
1/4 tsp salt
3/4 cup granulated sugar
3/4 cup flavorless oil (like canola or grapeseed)
1 large egg
1/2 tsp pure vanilla extract
2 to 4 tsp red food coloring (optional)
1/2 cup buttermilk
1 tsp vinegar (white or apple cider)

Preheat oven to 350F.

Generously butter one 9-by-2-inch round cake pan. Sprinkle with flour, and tap out the excess. Set your pan aside.

In a medium bowl, sift together cake flour, cocoa, baking soda and salt. Set aside your dry ingredients.

In the bowl of a stand mixer, mix the sugar and oil on medium speed until well combined. Add egg and beat well. Add vanilla extract and food coloring (if using), and beat until well combined.

Add flour mixture, alternating with buttermilk, scraping the sides of the bowl with a rubber spatula as needed. Add vinegar to batter, and beat for 10 seconds.

Pour the batter into your prepared pan. Bake until a cake tester inserted in the center of the cake comes out clean, about 30 to 35 minutes.

Transfer to a wire rack to cool in the pan for 10 minutes. Remove cake from the pan, and return to the rack to cool completely.

Cream Cheese Frosting

8 ounces cream cheese, softened at room temp.
2 tbsp unsalted butter, softened at room temp.
1 cup confectioners' sugar, sifted
1/2 tsp vanilla extract

In the bowl of a stand mixer, beat cream cheese and butter until light and fluffy, about 2 minutes on medium speed. Add sugar and vanilla and beat until combined, about 2 minutes.

Chocolate Ganache Glaze

6 ounces semi or bittersweet chocolate*, finely chopped
*(54 - 72% cacao works well)
1/2 cup (4 fluid ounces) heavy cream

Place chopped chocolate in a medium heat proof bowl. Heat cream over medium heat until it comes to a gentle boil. Pour cream over chocolate and let it sit for 1 minute. Using a spoon or rubber spatula, gently stir the mixture until well combined.

How to assemble your "kisses"

Crumble the cooled cake either by hand or using a food processor. Place the cake crumbs in a large bowl. Add the cream cheese frosting and stir until well to combine the cake crumbs and frosting. The crumbs should hold its shape when gently squeezed together.

Shape your cake kisses by hand. I made my kisses approximately 2 inches high with a 1.5 inch diameter base. I was able to get 28 kisses, but the yield will vary depending on your size. Place the kisses on a sheet pan and refrigerate for at least 1 hour and as long as overnight. This chilling period will help the kisses hold its shape and allow the frosting to "soak" into the crumbs.

While the kisses are chilling, make your glaze. Place your chilled kisses on a wire rack set over a rimmed sheet pan (to catch any excess glaze). Spoon some glaze over each kiss to cover completely. Allow glaze to set, about 15 minutes.
 
back to top //PART 2