Sunday, 27 May 2007

0 Gateau Saint Honore

gsh_whole


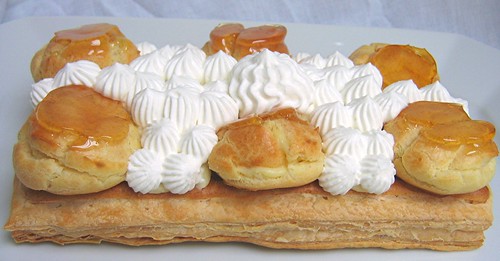
This month's Daring Bakers challenge of Gateau Saint Honore was, umm, challenging. But it was challenging for all the right reasons as opposed to last month's crepe cake which was challenging for the wrong reasons. According to hostesses Anita and Helene, both pastry professionals, Gateau Saint Honore is a required element to complete many pastry school programs. Multiple components and techniques are used to make this magnificent cake. A puff pastry base piped with pate a choux (cream puff dough), topped with caramel topped cream puffs filled with pastry cream encircling more pastry cream and topped with swirls of lightly sweetened whipped cream.

Anita and Helene gave us the option to substitute the rum in the Saint Honore cream with a flavoring of our choice. In my never ending quest to use up my meyer lemons, I chose lemon to flavor my cream. I cut strips of zest from 2 meyer lemons and steeped them with the milk. The lemon infused cream was my favorite part.

The gateau was absolutely delicious. But what's not to love about butter, cream, eggs, and sugar in various proportions and applications? Even though all the individual parts turned out well, I had some problems with my gateau.

I made my cream puffs too big and could only place 6 on each of my 2 rectangular bases. And since my cream puff border was a bit sparse, my Saint Honore cream was not "contained" properly and started dripping off the base in the spaces between the cream puffs.

My cream puffs didn't come out smooth enough so I piped my cream filling into the cracks on the side of the cream puff instead of the bottom of the puff. I forgot to face the "opening" inward when gluing so some of the holes (and the filling) are visible from the presentation side of the gateau.

Although the caramel added a nice flavor component and contrast to the GSH, my caramel disk atop the cream puffs were a bit thick and hard to eat. Sadly I had to cut off the tops of the puffs to remove the caramel.


I tried to make caramel sugar threads with the remaining caramel but it was a particularly humid day and the sugar just got all gummy. So no fancy spun sugar decoration for my gateau this time.

My piping skills are pretty much non-existent so my whipped cream decoration looks amateur.

So there you have it. Another installation of the Daring Bakers mission accomplished. We are now 48 Daring Bakers strong (including our very first man). By the way, Saint Honore is the patron saint of pastry chefs. I hope we made him proud.

gsh_nopuffsgsh_gluedpuffs
piped pate a choux on puff pastry rectangles (before and after gluing filled cream puffs to the base)

Note: I made some modifications to Helene and Anita's original recipe.

I didn't mention this in the assembly step but instead of an 11-inch diameter circle of puff pastry, I cut 2 rectangles instead. I adjusted my baking time accordingly.

I glued my filled cream puffs to my puff pastry/pate a choux base with caramel instead of setting them on the cream.

As I mentioned in the Saint Honore cream directions I used meyer lemon zest in my Saint Honore Cream. Feel free to use other flavorings like vanilla, rum, or Grand Marnier (which should be added to the warm cream while adding the gelatin).

I didn't have the specified sized pastry tips so I used whatever pastry tips I had on hand.

Gateau Saint Honore

Components
-- Puff Pastry
-- Pate a Choux (Cream Puff Dough)
-- Saint Honore Cream
-- 1 cup granulated sugar (for caramel)
-- 1 cup heavy whipping cream + 1 tsp sugar (for decoration)

gsh_comp

Puff Pastry
(makes about 2 1/2 lbs)

Dough package
3 cups all purpose flour, plus more for work surface
3/4 cup cake flour
1 1/2 teaspoons salt
4 tablespoons unsalted butter, cut into 1/2-inch pieces, well chilled
1 1/4 cups cold water

Butter package
1 tablespoon all purpose flour
14 ounces (3 1/2 sticks) unsalted butter, well-chilled

1/ Make the dough package: In a large mixing bowl, combine both flours with the salt. Scatter butter pieces over the flour mixture; using your fingers or a pastry cutter, incorporate butter until mixture resembles coarse meal.
2/ Form a well in center of mixture, and pour the water into well. Using your hands, gradually draw flour mixture over the water, covering and gathering until mixture is well blended and begins to come together. Gently knead mixture in the bowl just until it comes together to form a dough, about 15 seconds. Pat dough into a rough ball, and turn out onto a piece of plastic wrap. Wrap tightly, and place in refrigerator to chill 1 hour.
3/ Make the butter package: Sprinkle 1/2 tablespoon flour on a sheet of waxed or parchment paper. Place uncut sticks of butter on top, and sprinkle with remaining 1/2 tablespoon flour. Top with another sheet of paper; using a rolling pin, pound butter to soften and flatten to about 1/2 inch. Remove top sheet of paper, and fold butter package in half onto itself. Replace top sheet of paper, and pound again until butter is about 1/2 inch thick. Repeat process two or three times, or until butter becomes quite pliable. Using your hands, shape butter package into a 6-inch square. Wrap well in plastic wrap, and place in refrigerator until it is chilled but not hardened, no more than 10 minutes.
4/ Assemble and roll the dough: Remove dough package from refrigerator, and place on a lightly floured work surface. Using a rolling pin, gently roll dough into a 9-inch round. Remove butter package from refrigerator, and place it in the center of the dough round. Using a paring knife or bench scraper, lightly score the dough to outline the butter square; remove butter, and set it aside. Starting from each side of the center square, gently roll out dough with the rolling pin, forming four flaps, each 4 to 5 inches long; do not touch the raised square in the center of the dough. Replace butter package on the center square. Fold flaps of dough over the butter package so that it is completely enclosed. Press with your hands to seal.
5/ Using the rolling pin, press down on the dough at regular intervals, repeating and covering the entire surface area, until it is about 1 inch thick. Gently roll out the dough into a large rectangle, about 9 by 20 inches, with one of the short sides closest to you. Be careful not to press too hard around the edges, and keep the corners even as you roll out the dough by squaring them with the side of the rolling pin or your hands. Brush off any excess flour. Starting at the near end, fold the rectangle in thirds as you would a business letter; this completes the first single turn. Wrap in plastic wrap; place in refrigerator 45 to 60 minutes.
6/ Remove dough from refrigerator and repeat process in step 5 giving it five more single turns. Always start with the flap opening on the right as if it were a book. Mark the dough with your knuckle each time you complete a turn to help you keep track. Chill 1 hour between each turn. After the sixth and final turn, wrap dough in plastic wrap; refrigerate at least 4 hours or overnight before using.

Pate a Choux (Cream Puff Dough)

4 3/4 ounce all purpose flour
1 cup water
2 ounces (4 tbsp) unsalted butter, cut into 4 pieces
1/4 tsp salt
1 cup eggs (5 large eggs)

Sift the flour and set aside.
Heat the water, butter and salt to a full rolling boil, so that the fat is not just floating on the top but is dispersed throughout the liquid.
Stir the flour into the liquid with a heavy wooden spoon, adding it as fast as it can be absorbed. Avoid adding it all at once or it will form clumps.
Cook, stirring constantly and breaking up the lumps if necessary, by pressing them against the side of the pan with the back of the spoon until the mixture comes away from the sides of the pan, about 2-3 minutes.
Transfer the dough to a mixer bowl. Let the paste cool slightly so that the eggs will not cook when they are added. You can add and stir the eggs by hand but it requires some serious elbow grease.
Mix in the eggs, one at a time, using the paddle attachment on low or medium speed. Do not add all the eggs at once. It'll look like a mess but will come together after the addition of the last egg. Now the dough should have the consistency of thick mayonnaise.
Transfer the dough to a piping bag and use as desired.

Saint Honore Cream

1 envelope unflavored gelatin (7 gram)
1/4 cup cold water
1/2 cup + 2 tbsp granulated sugar
1/2 cup all purpose flour
1/4 tsp salt
5 egg yolks
2 cups whole milk
zest from 2 meyer lemons (in strips)
1/4 cup heavy whipping cream
3 egg whites
pinch of salt
1/2 cup granulated sugar

Soak the gelatin in the 1/4 cup of cold water.
Put the sugar, flour, and salt into a saucepan and stir together with a whisk. Add the yolks and enough milk to make a paste. Whisk in the remainder of the milk and the strips of lemon zest.
Place over low heat and stirring constantly, cook until thick. Remove from heat and strain to remove the strips of lemon zest. Stir in the gelatin. Stir until the gelatin is completely dissolved.
Stir in the heavy whipping cream (yes, it is unwhipped). Set the mixing bowl in cold water and stir until the cream is cool. Place the egg whites in a clean bowl and using clean beaters, whip them with the pinch of salt. As soon as the whites begin to stiffen, gradually add the 1/2 cup of sugar and beat until they are very stiff. Fold the egg whites into the cooled cream.

Assembly

Roll the puff pastry out to 1/8 inch (3 mm) thick, 12 inch square (30 cm). Place on a sheet pan lined with parchment paper. Refrigerate covered at least 20 minutes.
While the puff pastry is resting, make the pate a choux and place it in a pastry bag with a # 4 (8mm) plain tip. Reserve.
Leaving the puff pastry on the sheet pan, cut an 11 inch (27.5 cm) circle from the dough and remove the scraps. (An easy way to cut it is to use an 11inch tart pan as a “cookie cutter”). Prick the circles lightly with a fork.
Pipe 4 concentric rings of Pate a Choux on the pastry circle. Pipe out 12 cream puffs the size of Bing cherries onto the paper around the cake.
Bake the puff pastry circle and the cream puffs at 400F (205C) until the pate a choux has puffed, about 10 minutes. Reduce the heat to 375F (190C) and bake until everything is dry enough to hold its shape, about 35 minutes longer for the cake and 8 minutes longer for the cream puffs (just pick them up and take them out as they are done)
Place about 4 oz (114 gr) of the Saint Honore Cream in a pastry bag with a #2 (4mm) plain tip. Use the pastry bag tip or the tip of a paring knife to make a small hole in the bottom of each cream puff. Pipe the cream into the cream puffs to fill them. Refrigerate.
Spread the remaining cream filling on the cake. Refrigerate for at least 2 hours to set the cream.

Caramelize the 1 cup of sugar

Fill a bowl that is large enough to hold the pan used for cooking the sugar with enough iced water to reach halfway up the sides of the pan. Set the bowl aside.
Place the sugar in a heavy bottomed pan and cook until the sugar until it has caramelized to just a shade lighter than the desired color.
Remove from the heat and immediately place the bottom of the pan in the bowl of iced water for about 10 seconds to stop the cooking process.
Dip the cream puffs into the hot caramel, using 2 forks or tongues to avoid burning your fingers. Place them on a sheet pan. The caramel must be hot enough to go on in a thin layer. Reheat if necessary as you are dipping, stirring constantly to avoid darkening the caramel any more than necessary. Also, avoid any Saint Honore cream to leak out of the puffs and get mixed in with the caramel while dipping as the cream can cause the sugar to recrystallize.

Decorate

Whip the one cup of heavy whipping cream + 1 tsp sugar to stiff peaks. Place the whipped cream in pastry bag fitted with a #5 (10mm) star tip. Pipe a border of whipped cream around the top of the cake. Arrange the cream puffs, evenly spaced, on top of the filling, next to the cream.

gsh_angle

Tuesday, 22 May 2007

0 Meyer Lemon Butter Cookies

lemonsable1022a


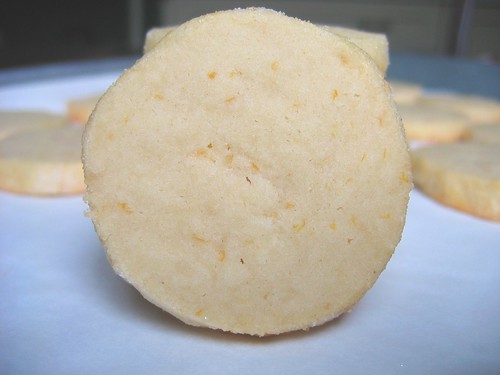
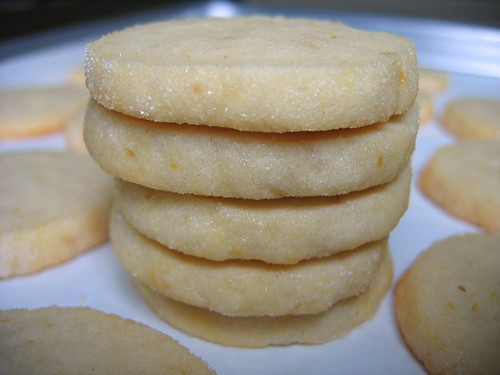
Like I mentioned in my previous post, meyer lemons would be making a frequent appearance here. These lemon butter cookies (sablés au citron) are one of my favorite slice-and-bake icebox cookies. The recipe is from Dorie Greenspan's Paris Sweets cookbook and she adapted it from the sablés made at Patisserie Lerch. These cookies are full of bright citrus zest and are oh-so tender. The secret to the tenderness is that confectioners' sugar is used in the dough instead of granulated sugar.

I wish that computers had smell-o-vision because the amazing fragrance of the meyer lemon that fills my kitchen while these cookies bake is beyond words. I would even wear a perfume that smelled like they do right when they come out of the oven. If only I could capture the scent in a jar. But I guess I'll have to get my fill by making these cookies more often instead.

lemonsable1011

Sablés au Citron
(from Paris Sweets by Dorie Greenspan)
(makes 50 cookies)


8 ounces (2 sticks) unsalted butter, softened at room temp.
2/3 cup confectioners' sugar (measured then sifted)
2 large egg yolks (divided use: 1 for dough, 1 for coating)
pinch of salt
2 tsp vanilla extract
2-4 tsp finely grated lemon zest (to taste)
2 cups all purpose flour
approximately 1/2 cup granulated sugar (for coating)

In the bowl of a stand mixer, beat butter on medium speed until smooth, add the confectioners' sugar and beat until smooth. Beat in 1 egg yolk, followed by salt, vanilla and lemon zest.

On low speed, add the flour and mix just until flour is incorporated.

Turn dough out onto a counter, gather dough into a ball, divide in half, and wrap each piece in plastic wrap. Chill dough for 30 minutes in refrigerator.

Form each piece of dough into a log that is about 1 to 1 1/4 inches in diameter. (If the diameter is right, the length you end up with is fine. Mine are usually about 6 inches long.) Wrap logs in plastic wrap and chill dough for 2 hours in refrigerator. (Dough logs can be wrapped airtight and kept refrigerated for up to 3 days or stored in freezer for up to 1 month.)

Preheat oven to 350F. Line your baking sheets with parchment paper.

If you are coating your cookies with sugar, whisk the remaining egg yolk until it's smooth and liquid enough to use as a glaze. Spread granulated sugar out on a piece of waxed paper. One log at a time, unwrap your chilled dough log and brush lightly with the egg yolk. Roll the log in sugar, pressing gently to help the sugar stick.

Slice each log into rounds about 1/4 inch thick. Place on baking sheets, leaving about 1/2 inch between the cookies.

Bake at 350F for 12-14 minutes until they are set but not browned. (It's okay if the yolk-sugar edges brown slightly.) Transfer cookies to cooling rack.

lemonsable1016

Notes:
You can use a different citrus zest in this recipe.
Definitely give the dough logs the 2 hour rest in the refrigerator.
It's optional to coat the edges in sugar (I did a very light coating using less than the 1/2 cup granulated sugar stated in the recipe.)

Thursday, 17 May 2007

0 Lemon Coconut Macaroons

lemoncoconutmac936


As foggy as it is in my neighborhood, we're lucky that there is one fruit that we can grow successfully - the meyer lemon. Lucky because I am a lemon lover. I may have mentioned before that I would almost always choose a lemon dessert over a chocolate one. (I know, it's practically blasphemous.) I'm trying my hand at growing eureka lemons too, but my little twig of a tree only has one unripe but very large grapefuit sized lemon so far.

My meyer lemon tree is a totally different story. The delicate branches are so heavy with fruit right now that they are bent and the still attached lemons are practically sitting on the ground. With such an abundance of meyers, I've been giving them away as well as trying to put them in everything I make. From seafood and chicken to cakes and cookies, I work my way through the pile only to pick more fruit on the weekends. So you'll probably be seeing a lot of meyer lemons featured here over the next few weeks.

These lemon coconut macaroons are so quick and easy to make. The addition of lemon zest really cuts down on the sweetness and adds a wonderful flavor and fragrance to a basic coconut macaroon. I used meyers of course, but regular lemons (or limes) would be great too.

Lemon Coconut Macaroons
(adapted from Gourmet magazine April 2007)

2 large egg whites
2 tbsp granulated sugar
1 tbsp finely grated lemon zest
pinch of salt
1 3/4 cup sweetened flaked coconut
1 tsp potato starch or all purpose flour

Preheat oven to 325F. Line a baking sheet with parchment paper or silicone sheet.

Stir egg whites, sugar, lemon zest, salt to combine.

Toss coconut with potato starch and then add the coconut to egg mixture and mix well.

Scoop out 15 mounded tablespoons onto baking sheet, spacing them about 1.5 inches apart.

Bake at 325F for 16-18 minutes until the tops are light golden brown in spots.

Allow to cool on baking sheet for about 10 minutes.

lemoncoconutmac939

Friday, 11 May 2007

0 Coffee Chocolate Towers

whchocespmousse580


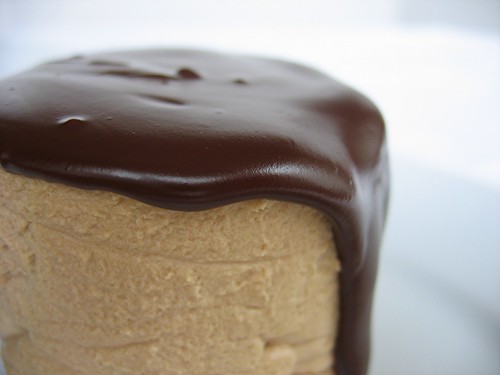
A few weeks ago I thought about making these coffee chocolate towers for the HHDD mousse event, but I ended up making the chocolate peanut butter mousse cake instead. But these towers of mousse from Emily Luchetti's "A Passion for Desserts" looked too good not to try. And what's not to like about chocolate cake with white chocolate coffee mousse?

In my humble, non pastry professional opinion I'll admit that the chocolate cake base didn't really add much to this dessert. But I'm not one to question Emily Luchetti's expertise. But just between you and me, the star is really that column of mousse.

Since the mousse is essentially just heavy cream and white chocolate, try to use the best ingredients you can find. I used heavy cream from the Strauss Family Creamery in nearby Tomales Bay and white chocolate (31% cocoa butter content) from E. Guittard. Don't use that "white colored chocolate" which is made from solid or hydrogenated vegetable fats. Make sure there is actually cocoa butter in your white chocolate. It'll really make a difference in the finished mousse.

Coffee Chocolate Towers

Chocolate Cake
1/4 cup cocoa powder
6 tbsp all purpose flour
1/8 tsp baking powder
pinch of salt
2 ounces (4 tbsp) unsalted butter, softened at room temp.
1/2 cup granulated sugar
2 large eggs
3 tbsp buttermilk
1/2 tsp vanilla extract

White Chocolate Coffee Mousse
9 ounces high quality white chocolate
1/4 cup strong coffee
2 tsp instant espresso powder
1 1/4 cup heavy whipping cream

Chocolate Glaze
3/4 cup heavy whipping cream
1 tbsp light corn syrup
1 ounce (2 tbsp) unsalted butter
8 ounces bittersweet chocolate, finely chopped

To make the chocolate cake

Preheat oven to 350F. Butter and 8-inch square pan and line with parchment paper. Butter the paper.

Sift together the cocoa, flour, baking powder, and salt. Set aside dry ingredients.

Cream butter and sugar until smooth, about 1 minute with a stand mixer. Add the eggs, one at a time, beating for 15 seconds after each addition.

In a small bowl, stir together the buttermilk and vanilla. On low speed, add the dry ingredients in 3 additions alternating with the buttermilk and ending with the dry ingredients, mixing until just combined. Evenly spread batter into prepared pan.

Bake at 350F for about 15 minutes or until cake tester comes out clean. Let cake cool in pan.

Note:
According to Emily, if you don't have pastry ring molds for your mousse towers, you can use 6-ounce tomato paste cans. Just cut off both ends and you'll have reusable ring molds. Or, if you don't have tomato paste cans, you can use stainless steel cookie cutters like I did.


cookie cutter

To cut the chocolate cake

Run a knife around the inside edge of cake pan and invert onto a cutting board. Peel off parchment paper. Using a clean pastry ring mold or tomato paste can (see note), cut out 6 circles of cake. Set cake circles aside.

Line the insides of six 6-ounce tomato paste cans (see note) with pieces of parchment paper 7.5 x 3.5 inches long, Place the lined cans on a parchment lined baking sheet.

To make the mousse

Melt the white chocolate, coffee, espresso powder together in a medium bowl set over a pot of barely simmering water. Whisk until smooth and let cool to room temperature, stirring occasionally.

In a large bowl, whip the cream until very soft peaks form. Fold the white chocolate mixture into the cream. Divide the coffee cream between the lined tomato paste cans (see note).

To make the glaze

Warm cream, corn syrup, and butter in a medium saucepan over medium heat until it bubbles around the edges. Remove from heat and whisk in the bittersweet chocolate. Cool until glaze has thickened but is still pourable, about 15 minutes.

Place a chocolate cake circle gently but firmly in each can on top of the mousse. Remove the mousses from the cans and place them cake side down onto wire rack. Peel off the parchment paper. Place the rack on a sheet pan line with parchment paper. Carefully pour the glaze over the top of each of the mousses, letting it run down the sides. Refrigerate towers until firm, about 1 hour.

The towers can be made one day in advance and kept refrigerated.

whchocespmousse624

Saturday, 5 May 2007

0 Loafing Around

bananab_loaf


A few months ago Cook's Illustrated magazine picked the Williams-Sonoma Goldtouch nonstick loaf pan as their top loaf pan. I wondered if it was better than my current nonstick loaf pan from Chicago Metallic. So I walked over to the nearby Williams-Sonoma store and purchased a pan. At $19, it was definitely pricier than any other loaf pan I had ever owned, but it was not an outrageous price for a baking pan. (Ahem, I'm talking about you All-Clad. I own your cookware but $85 for a loaf pan is just crazy!)

I decided to start with baking a loaf of zucchini bread. I actually really like zucchini bread and I make it all year round. It's not just something I make when my garden has too many zucchini in the summer. (Although I haven't grown zucchini in my garden for 4 years now because I got tired of fighting the battle against powdery mildew. Doesn't help that we live in the fog belt of San Francisco.)

For my zucchini bread, I adapted a recipe from The Baker's Dozen Cookbook. Since the nonstick surface on the Goldtouch pan is lighter than most nonstick finishes, the crust was a perfect shade of golden brown. The crust had a nice chew without any toughness. It was a perfect contrast to the moist, flavorful center of zucchini, walnuts and cinnamon. Now, I don't know if the pan made any difference in this case but I must say it was the most delicious zucchini loaf I've made in quite some time. Sometimes I don't know if it's the equipment, the recipe, or the baker.


WS Goldtouch Nonstick Loaf Pan (L) Chicago Metallic Nonstick Loaf Pan (R)

To really see if the Goldtouch pan would produce a better loaf than my tried and true Chicago Metallic nonstick loaf pan, I did a side by side comparison by baking 2 loaves of banana bread. My unscientific conclusion is the Goldtouch pan doesn't make a difference. The 2 banana breads looked and tasted exactly the same.

bananab_close

Banana Bread
(Makes two 8.5 x 4.5 inch loaves)

2 1/2 cups all purpose flour
2 tsp baking soda
1 tsp salt
1 cup granulated sugar
1/2 cup light brown sugar
8 ounces (2 sticks) unsalted butter, softened at room tmp.
4 large eggs
2 1/2 cups mashed overripe bananas
(This could require 4-6 bananas depending on the size of your bananas)
1 cup coarsely chopped walnuts

Preheat oven to 350F. Lightly butter two 8.5 by 4.5 inch loaf pans (sometimes referred to as an 1-pound loaf pan).

Sift together flour, baking soda, and salt. Set aside dry ingredients.

Beat butter and both sugars until well combined (using a spoon or a mixer). Add eggs, one at time, beating well after each addition. Mix in the mashed bananas until well combined. Mix in walnuts.

Add dry ingredients and mix until flour is just incorporated. Some lumps are okay. It's better to undermix than overmix.

Divide batter evenly into the 2 prepared loaf pans.

Bake at 350F until cake tester comes out clean, about 1 hour.

Cool in pans for about 20 minutes before removing loaves from pans to cool completely on a rack.

~.~

zucchiniloaf448

Zucchini Bread
(Makes one 8.5 x 4.5 inch loaf)

1 1/2 cups all purpose flour
3/4 tsp ground cinnamon
1/8 tsp ground cloves
3/4 tsp baking soda
1/2 tsp baking powder
1/2 tsp salt
1/2 cup vegetable oil
1 cup light brown sugar
1 tsp vanilla extract
1 cup (6 ounces by weight) grated zucchini
1/2 cup coarsely chopped walnuts

Preheat oven to 350F. Lightly butter an 8.5 by 4.5 inch loaf pan (sometimes referred to as a 1-pound loaf pan).

Sift together flour, cinnamon, cloves, baking soda, baking powder and salt. Set aside dry ingredients.

In large bowl, whisk together oil, sugar, and vanilla. Stir in zucchini and walnuts. Add dry ingredients and mix until flour is just incorporated. Some lumps are okay. It's better to undermix than overmix.

Bake at 350F until cake tester comes out clean, about 50 minutes.

Cool in pan for about 20 minutes before removing loaf from pan to cool completely on a rack.

zucchiniloaf432
 
back to top //PART 2