Sunday, 28 February 2010

0 ALMOND JOY SHORTBREAD BARS


i'll make this quick...

Chocolate Dipped Coconut Shortbread with Roasted Salted Almonds...

what's more to say?...they're good, they're great, they're pretty and they're impressive. not too much of any one flavor, just enough for each element to shine and create that fab taste trio that you get from an Almond Joy...chocolate, coconut and almond.


.
i find this recipe a classic for dense Scottish Shortbread.
i've used this recipe quite a few times with a few changes in flavor and it always works well. many thanks to Barry the blogger @ ROCKRECIPIES for the recipe copied below. you'll find my notes and changes following the original.

Cream together:
1 cup salted butter
3/4 cup sugar
Add 2 tbsp vanilla extract
Fold in:
4 cups flour


for the coconut flavor i added a rounded 1/2 cup of shredded sweetened coconut. i put it in the processer until i didn't see any more long shreds, not to powder form but close to it.

i used 2/3 cup sugar instead of 3/4 cup

and used 1 tsp vanilla AND 1 tsp coconut extract

Roll in balls and flatten or roll out and cut into shapes as desired. I like to bake the dough in large rectangles and then cut the cookies in fingers just when they come out of the oven and are still warm. (don't forget to use a parchment sling)
Bake at 350 degrees 12-15 minutes until edges are golden brown. Allow longer baking time if you are baking the large rectangles of dough to be cut in fingers.
.
my shortbread notes.....i put the dough directly into the pan and start pressing down firmly....i mean i like this dough packed in tight, i don't want it flakey at all. press all the way to the edges. i put a flat surface in top, like a book and stood on it for goodness sake! then half way through the cooking i went in and lightly pressed the top with the bottom of a flat glass...
i think shortbread like this should be scored before cooking. then cut all the way through while still warm. i like to keep it in the pan through the whole process until completely cool in order to really hold it's sharp edges.

to creat the Almond Joy look...


my suggestion is to use roasted salted almonds (always the sweet and savory)


before dipping you must secure each almond to the top of the cookie with a dab of chocolate and let dry...check that they are stuck on there good, then proceed with your dipping. i chose to dip just the tops. i didn't want the chocolate to overpower the almond or coconut flavors. dip two cookies then sprinkle with a little coconut. they're kind of tedious at this point and a bit messy, but well worth it when your friends look at you in disbelief ..."did you actually make these?"

i must say they are excellent with a nice warm cuppa tea or a tall hot latte.

Saturday, 27 February 2010

0 SIMPLE ROASTED VEGGIE SOUP


ROASTED VEGGIE SOUP...i know we've seen a bucket-full already this winter, but i don't think it can be said enough how easy and rewarding this little "bowl of gold" can be. the color, texture and flavor are well worth the few simple tasks it requires for this wonderful, smooth, savory pureed soup.

there are so many ways to prepare this soup and all of them are good. for instance some say cut the squash in half and roast it cut side down on a cookie sheet. some say boil the squash cubes in broth. some say butternut only. some say this and some say that. i can only tell ya what I SAY...

i say..use peeled and cubed squash because it gives a more roasty per square inch flavor.

for this batch i chose the ever popular butternut squash. the week before i used banana squash which was very similar to pumpkin. during pumpkin season i went wild with those cute little pumpkins. i kept buying them for decoration, but they would end up in a soup before the week was up. there's nothing like that pure, rich, deep orangy pumpkin meat.

HOW TO...

choose your squash. something like a med. size butternut.

peel and cube

2 small onions quartered (leave root end on so they don't fall apart)

5-10 cloves garlic (i like alot) peeled before or after roasting...just watch it. you might have to remove cloves before the squash is done

spread everything on a large cookie sheet

drizzle with olive oil

season with salt pepper and garlic salt

toss around on the sheet so everything is coated

roast in a 375 degree oven. approx 45-50 minutes

check every 10-15 minutes and stir

done when fork tender

now..put all your yummy roasted veg. into a deep stock pot and cover with approx. 6 cups of stock. i prefer homemade chicken broth. boxed or canned will be just fine. vegetable or beef is good too. what ever you have on hand.

cover veggies by an inch or two. remember you can always thin out your finished product by adding more stock, but you can't take it out.
add 1-2 tsp dried oregano

1 bay leaf

bring to boil and immediatly turn to a simmer for 15-20 minutes

get out your immersion blender or GO BUY ONE...

a stick blender makes life so much easier in the creamy soup world. of course you can use your stand blender or food processer, but it's such a mess and if you've never pureed hot soup before. it can be quite dangerous. just go get a stick (immersion) blender. you'll love it and use it all the time.

remove bay leaf and blend untill smooth and creamy.

check seasoning and add what's needed.

at this point you can thin it to your preferred consistancy with some more stock . my mother likes to add milk or cream, but i like the pure veggie taste. when left a bit thick this makes a great pasta sauce or is just fabulous under roasted chicken or fish as a nice color addition to the plate.

so...starter, main course...soup or side dish?...i like to keep something like this in the fridge as a staple for those cold rainy days or those "WHAT WILL WE HAVE FOR DINNER?!" nights. this will always add some color and make any quick meal feel homemade and slaved over.


Friday, 26 February 2010

0 Daring Bakers Pick Me Up

tiramisu_1


Time for another Daring Bakers' challenge. This month's challenge was hosted by Aparna of My Diverse Kitchen and Deeba of Passionate About Baking. They came up with an amalgamation of recipes for a tiramisu. Their challenge recipe is based on recipes from The Washington Post (newspaper), Cordon Bleu at Home (cookbook) and Baking Obsession (blog).

Tiramisu is typically custardy mascarpone cream layered with ladyfingers/savoiardi biscuits soaked in espresso. A little bit of booze like marsala or rum is usually present too. We were required to make the mascarpone cheese and ladyfingers from scratch. We were also required to make the zabaglione and pastry cream for the custardy cream layers.

I've never thought about making mascarpone from scratch since I can buy an 8 ounce tub for about $3 around here. The recipe looked fairly straightforward. Who knew it was just heated heavy cream and lemon juice? I used a really nice 36% butterfat organic cream. Unfortunately, even though I heated the cream for 30 minutes in a stainless steel bowl in a skillet of simmering water, my cream never got any hotter than 170F. The instructions said it would get to 190F in about 15 minutes. So I forged ahead anyway and added the lemon juice and waited for the curds to form. That never happened either. So after another 10 minutes I just poured my "cheese" into my cheesecloth lined strainer. After the overnight refrigeration I expected that some whey would have drained out. Nope, my "cheese" looked no different than it had when I first pour it into the cheesecloth and it looked nothing like creamy mascarpone.

Then I tried to remove my mascarpone from the cheesecloth. It was stuck on pretty tightly. So tight that when I forcefully scraped it off the cloth, all I got was a block of "cheese" covered in lint. I thought cheesecloth was supposed to be lint free? Maybe I got the wrong kind of cheesecloth? (I used a 100% unbleached cotton cheesecloth.) So I scraped off the linty side of the mascarpone and saved the unlinty part to use in my tiramisu. Thank goodness we only needed 1/3 cup for the tiramisu.

I love ladyfingers. When I was a little girl, sometimes my dad would take me with him while he went to Ahren's Bakery on Van Ness Avenue to pick up some pastries for the restaurant. The bakery workers were always so nice to me. While I waited for them to fill my dad's very large order, they always handed me a giant cookie from the bakery case. I felt so special. But the best part of our trips to Ahren's was the bag of soft ladyfingers that we would bring home. Sets of five ladyfingers were lined up next to each other waiting to be pulled apart. I can still recall that soft, airy interior with that wonderful crispy, sugary crust. I wonder if Ahren's was still around today and I ate one of their ladyfingers would I still love it as much as I did as a child? I'd love to say yes, but the truth is probably not. The most flavorful ingredient is nostalgia.

tiramisu_ladyfingers1

tiramisu_ladyfinger2


I loved this ladyfinger recipe. They remind me of those from my childhood. I couldn't help but sneak a few bites everyday. Well, maybe I had more than a few bites. By the time I was ready to assemble my tiramisu three days later, I only had enough ladyfingers for two layers instead of three. I plan to make these ladyfingers again and again.

In the past I've only made tiramisu recipes that had a zabaglione with mascarpone. But this recipe had the unusual addition of a pastry cream. It was also a bit strange that it only called for a teeny tiny amount of mascarpone cheese. Typically mascarpone makes up a large portion of the cream layers. The zabaglione was easy to make. The method for the pastry cream was a bit different than I am used to since the cold milk was combined with the egg then cooked. I am used to warming the milk, adding it to the eggs and then cooking it until thick. I think the cold milk method took longer to thicken than the warm milk method, but the resulting pastry cream was just fine.

tiramisu_3


We were allowed to assemble our tiramisu any way we liked. I decided to use an 8-inch round springform. If I knew ahead of time that I was going to use a round cake pan for assembly, I would have piped my ladyfinger batter into 8 -inch disks instead of individual fingers. It would've made for a nicer presentation.

Overall the tiramisu was delicious. But what's not to like about whipped cream, custard and coffee soaked ladyfingers? Even though I found the whole recipe to be a bit overly complicated and fussy for a tiramisu and I would probably never make this exact version of tiramisu ever again, I'm so happy that I have gotten such a great ladyfinger recipe out of this DB challenge. Okay, I'm off to have another slice now.

tiramisu_2


The fine print:
The February 2010 Daring Bakers’ challenge was hosted by Aparna of My Diverse Kitchen and Deeba of Passionate About Baking. They chose Tiramisu as the challenge for the month. Their challenge recipe is based on recipes from The Washington Post, Cordon Bleu at Home and Baking Obsession.

Continue reading...

Saturday, 20 February 2010

0 Coconut Goodness

coconut_cupcake1


During a recent trip to New York City my brother Rich wanted to stop at Magnolia Bakery. He had tried Magnolia's coconut cake once before and absolutely loved it. Since we were close enough to the Rockefeller Center location of Magnolia we walked over to have a slice. As we approached the bakery we saw the huge line of about 40 people wrapped around the corner storefront. I've never seen such a long line for any bakery except perhaps Tartine Bakery here in San Francisco. We decided that no cake was worth that wait especially since it was about 40 degrees F that night. (We're wimpy Californians.)

I told Rich that I would make him a coconut cake when we got back from NYC. I delivered on my promise by making him some coconut cupcakes. It has all the components of a layered coconut cake but in cupcake form.

The cupcake batter has coconut milk, shredded coconut and coconut rum. The filling is a coconut pastry cream. The cream cheese frosting has some of the coconut pastry cream mixed in and then the whole thing is topped off with some toasted coconut.

I don't know how much more coconut goodness I could've packed into this cupcake, but I did my best to really max out the coconut factor and I think I succeeded. So if you're looking for a cupcake that really screams coconut from head to toe, this one is for you.

coconut_cupcake2

Continue reading...

Tuesday, 16 February 2010

0 JAPANESE CUSTARD MOCHI SQUARES

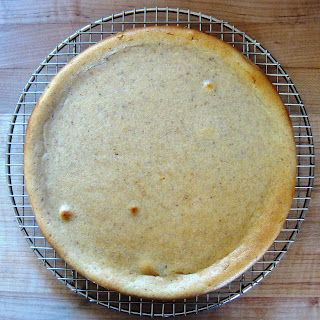
this recipe caught my eye a while back because i do love my custards and the fact that they can be served square rather than pie shape or molded. of course, now i have found that i can make alot of custard type desserts square (such as my Ginger Orange Custard Squares) with the right ingredients. i also love the idea that it came from someone's "Mama-san" so i believe this is a real authentic Japanese treat. if it's not, well, at least i know it came from a real "Mama-san". many thanks to the original blogger, Wasabi Prime, and his mom for posting this delicate little sweet treat.

i don't know about you, but i haven't experienced too many MOCHI treats. i have tried the frozen ice cream mochi balls from Trader Joe's...those are fun. i'm not quite used to the chewy texture. once i realized that's what it was supposed to be like, i was OK with it. i found the custard top half to be just a little too sweet, but i think it's meant to be that way to balance out the mochi bottom. funny, but i think this is actualy just a Japanese Impossible Pie...same concept. the rice flour settles to the bottom and forms a base for the custard.

would i make this again?...pobably not for myself, but if i knew someone was a custard fan and or loved mochi, i would definitely introduce this treat. it's quite lovely dressed up with a little crystalized ginger and ginger syrup...nice presentation and a unique dessert.

Wasabi Mom's Custard Mochi
found at Wasabi Prime
Ingredients

1/2 cup butter, softened
1 3/4 cup sugar
4 cups milk (2% or higher)
4 whole eggs
2 tsp vanilla extract
2 cups mochiko (rice flour)
2 tsp baking powder

Preheat oven to 350 degrees. Grease 13 X 9 pan. In large bowl, cream butter and sugar. Add eggs one at a time, beating after each addition. Add remaining ingredients and mix until well blended. Pour into pan and bake for 1 hour and 20 minutes, or until center is firm. Cool and chill in refrigerator. Cut into squares -- my mom (Mama-san) suggests using a plastic knife for easier cutting. Do as Mom says, she knows best.

Monday, 15 February 2010

0 Impossible Enchilada Pie

HI...as promised the Impossible Enchilada Pie.

i just love these Impossible Pies. not only are they easy, simple and portable (just fine at room temp if necessary), they can be low fat, low carb and high protein. these things make me happy. with my new found love of baking sweets, i find that being a little health conscious at meal time makes things balance out. try using ground turkey instead of beef, reduced fat cheese and or sour cream, serve it with a crisp salad and you're good to go. GO, as in, "GO ahead and have that peice of chocolate cake fresh out of the oven calling your name."


Ellen's Kitchen has a selection of recipes for sweet dessert or savory dinner pies... lots for you to choose from. i have already made the Cheeseburger Pie, this Enchilada Pie and i'm looking forward to the Pizza Pie. i've linked her site and i've copied this pie recipe below for your convenience.


IMPOSSIBLE BEEF ENCHILADA PIE- FRITOS
Ellen's Kitchen-Impossible Pies


2 cups (1 lb.) cooked, drained ground beef (i used chorizo and ground turkey)

1 cup chopped onion

2 cloves garlic, finely chopped, OPTIONAL

2 teaspoons chili powder

1/2 teaspoon dried oregano leaves

1/2 teaspoon salt

1/4 teaspoon pepper

8 oz. taco sauce

2/3 cup finely crushed tortilla chips(go for FRITOS. i wish i had)

2 cups shredded Cheddar cheese (8 oz.)

1 1/4 cup milk

3 large eggs

3/4 cup baking mix(use Bisquick or Ellen's Baking Mix)


Heat oven to 400 degrees. Grease pie plate 10 x 1 1/2 inch. Cook and stir ground beef, onion and garlic until brown, drain. Stir in chili powder, oregano, salt, pepper and 1/2 cup taco sauce. Sprinkle tortilla chips evenly in plate. Top with 1 1/2 cups cheese, spread with beef mixture. Beat milk, large eggs and baking mix until smooth, 15 seconds in blender on high or 1 minute with hand beater. Pour into plate. Bake until knife inserted in center comes out clean, 25-30 minutes. Spread remaining taco sauce over top, sprinkle with remaining cheese. Bake until cheese is melted, 3-5 minutes. Cool 10 minutes. Serve with chopped tomato, shredded lettuce and sour cream if desired. 6-8 servings.

MY NOTES...this was another winner..i know i could have done better, but i had to hold back on extra heat and spices i would have normally put in. the family just can't take it. i say this because i found this pie needed a little extra flavor. i felt i had to dress it up too much with all the salsas, avocado, radish, cilantro, chopped this and that, blah, blah, blah...i know i could do better. so if you're interested in trying this...get some more seasoning in there. make it simple and just add some taco seasoning from a packet.

this is simple so keep it that way and you'll find yourself making these pies for those "no-brainer dinner" nights.

Wednesday, 10 February 2010

0 PERSIAN LOVE CAKE


THE PERSIAN LOVE CAKE...and it's full o' love.


while i'll admit it IS rather plain looking, this cake is very tasty and different than expected. it's an interesting rich treat and a definite conversation piece. this almond based cake is a great change from your usual chocolate valentine dessert, so why not surprise your guest with a little Persian love. it's all about almonds and pistachios for the one you're so nutty about.


the crust and the outside rim are delicious. the color and texture have that yummy dense, toastie almondie look and flavor.


the candied pistachios are a must. one would think ALMONDS would be the nut of choice, being that the whole cake is made of almonds, but the pistachios are key. i rarely use them, but now i will keep them in mind. i couldn't keep my paws off them. i'm surprised i had any left for the cake. candied nuts are TROUBLE.
i found this recipe here and copied it below for your convenience. many thanks to Lili at Pikelet and Pie for introducing me to this treat.

Persian Love Cake


360 gm almond meal

220 gm raw sugar

220 gm brown sugar

120 gm unsalted butter, softened

2 eggs, lightly beaten

250 gm Greek-style yoghurt, plus extra to serve

1 tbsp freshly grated nutmeg


Preheat oven to 180C. Combine almond meal, sugars, butter and 1 tsp salt in a bowl, then rub with fingertips until coarse crumbs form. Spoon half the mixture into a lightly buttered and baking paper-lined 26cm-diameter springform pan, gently pressing to evenly cover base.
Add egg, yoghurt and nutmeg to remaining crumble mixture and beat with a wooden spoon until smooth and creamy. Pour over prepared base, smooth top and bake until golden (30-35 minutes.) Cool completely in pan on a wire rack to room temperature, then serve with extra yoghurt. The cake will keep in an airtight container for up to a week.

Tuesday, 9 February 2010

0 Sesame Coins

sesame_cookies1


Every few years the Presidents' Day weekend coincides with Valentine's Day or with the Chinese New Year (aka the lunar new year). There is a confluence of the three this year which means my three day weekend will not be exclusively for rest and relaxation, but for observing Chinese New Year traditions.

The house must be cleaned and all laundry must be done before our Chinese New Year's Eve's dinner on Saturday. I have to wash away any bad luck that might have accumulated over the past year. The dinner signifies the beginning of the lunar new year so I don't want to do any sweeping after the meal or on New Year's Day. Otherwise I will sweep away the good luck of the new year.

There must be a new sack (or at least a significant quantity) of rice in the house so that we won’t go hungry in the new year. A big bowl of candy or sweets would be nice too so that the new year will be a sweet one. The traditional sweets are candied lotus root, melon, coconut, water chestnuts, and lotus seeds displayed in a lacquered candy box, but any candy will do. This year I'm setting out a bowl of almond torrone imported from Italy.

I need at least one pomelo, a large pear shaped yellow grapefruit, which symbolizes prosperity. Another necessity is tangerines with the stems and leaves still attached. The Chinese word for tangerine sounds like "gold" and will invite luck and wealth in the new year. The stems and leaves signify growth and longevity. Navel oranges are welcomed too since their round shape signifies wholeness and the golden color represents wealth. I'm not too strict about the citrus tradition. As long as I have one pomelo surrounded by any leafy citrus, I will be fine. This year I found some gorgeous blood oranges with stems and leaves at the farmers' market, but in the past I have used meyer lemons with leaves and stems from my backyard tree since they are also golden and round-ish. Blood oranges are extra nice since they are red on the inside. In my opinion, nothing is better than something that is red and gold for Chinese New Year.

cny2010


Which leads me to the best tradition - red envelopes. The red envelopes are decorated with symbols and images in gold. The color red symbolizes good luck and vitality. The envelopes are filled with crisp bills since the use of brand new money symbolizes a new beginning. The red envelopes are usually given by the married to the unmarried. Although some families, like mine, take a generational approach to red envelope giving during Chinese New Year. Even though I am married, my parents, and other relatives who are a generation older than I am, still give me red envelopes for Chinese New Year.

So what do these sesame coins have to do with Chinese New Year? Tahini isn't a particularly Chinese ingredient, but it's really just sesame seed butter and, well, sesame seeds are used a lot in Chinese cooking. And these cookies are sweet and look like golden coins (wealth and prosperity) and they are round (wholeness and longevity). So make some and have a prosperous new year!

sesame_cookies2

Continue reading...

0 BACON CASSEROLE BREAD

Bacon Casserole Bread.....

i'm thinkin' bacon?... YUM...casserole?...YUM...warm bread?...double YUM YUM...
well, i'm definitely a novice bread baker so i had no idea what i was getting myself into. by the title of the recipe i thought i was going to create some kind of delicious bacon-ie, casserole-ie, moist-ie, dense type of bread dish...woops...wrong. as i started, i soon realised i was making good old yeast rising bread with some bacon in it. after i got over that fact and moved on, i actually had some fun knowing that this would be my first bread baking experience (and bacon was involved). now i know why there's fun lovin' bread bakers out there. they get addicted to that lovely aroma that seems to follow you around the house while the bread is rising, baking and finally resting and lying in wait.

this recipe turned out to be a winner with the rest of the family, however, i don't think anyone even knew it had anything to do with bacon. only when you get a small nugget of bacon in a bite, do you question your taste buds. all in all, it's a great bread for breakfast with an egg on it, or perhaps a monkey's delight peanut butter and banana sandwich(PBB) and i bet any kind of panini would be fabulous. the texture,weight and flavor was perfect toasted or fresh.


BACON CASSEROLE BREAD
recipe found here and copied below

Ingredients:
1 1/2 cups milk, scalded
2 teaspoons salt
1/4 cup light brown sugar, packed
2 tablespoons bacon drippings
2 packages active dry yeast, about 2 tablespoons
1/2 cup water, warmed to about 105°
1 egg, beaten
4 cups all-purpose flour
1 cup whole wheat flour
1/3 cup cooked crumbled bacon

Preparation:
Combine milk, salt, 2 tablespoons of the brown sugar, and bacon drippings. Cool. Combine yeast, 2 tablespoons brown sugar, and warmed water. When yeast mixture begins to foam, add to cooled milk mixture. Add beaten egg, all purpose flour and whole wheat flour; beat for 3 minutes. Place in a greased bowl; cover and let rise for 45 minutes. Stir in bacon. Beat for 2 minutes then pour into a 2-quart casserole or two glass loaf pans about 9 x 5 x 3-inches. Let rise until batter reaches top of pan(s). Slash top diagonally a few times with a sharp knife. Bake at 375° for 35 to 40 minutes.

Saturday, 6 February 2010

0 OATMEAL CARAMELITA'S


Oatmeal Caramelitas...i like to call them "CARAMELITA'S WAY"

WOW! these packed little squares are a party in your mouth. i must admit, once again, i didn't read the recipe all the way through. i chose these on the mere fact that i read the word "OATMEAL". i was silly thinking that this single word alone meant "healthy". the photo looked packed with the heart-healthy oat so i tagged the recipe to make after the holidays. you know, fresh new start for the new year?...well, read on my friend...i must have mentally skipped over the 3, YES three! sticks of butter, 1 whole cup of honey and the 2 cups of chips(recipe calls for 1 1/2, but i had to round up) chopped nuts AND CREAM that were bold as ever. somehow i still think they are healthy...somehow i will convince myself this is true...somehow i will find any excuse to make these again.

i found these treats at DANA TREAT- Treat Yourself. by the way, check out her website. it has some great stuff and killer photos. i think i'll be making this Caramel Cake next...YUM!

Dana's recipe found here and copied below with some notes.

Oatmeal Carmelitas
With Love & Butter
18 big bars

1½ cups (3 sticks) butter, at room temperature

2/3 cup brown sugar, firmly packed

2 cups flour

2 cups oats (quick or old-fashioned)

1 tsp. baking soda

¼ tsp. salt

1½ cups chocolate chips

½ cup coarsely chopped walnuts (DT: I used pecans)

1 cup honey

½ cup half-and-half (DT: I used cream)

Preheat oven to 375° with the rack in the center position. Butter a 9×13-inch baking pan.
Cream the butter and brown sugar together with an electric mixer. Add the flour, oats, baking soda, and salt and combine. Reserve 1/3 of the dough. Press the remaining dough evenly into the buttered baking pan. Bake for 5 minutes, rotate the pan, and bake 5 to 10 minutes longer. The crust should be barely brown. Leave the oven on.
Scatter the chocolate chips and walnuts over the hot crust. Now blob the reserved dough as evenly as you can on top of the chocolate and nuts.
Combine the honey and half-and-half. Heat in the microwave or on the stove until hot but not boiling. Pour the honey cream sauce over the dough and bake 15 to 20 minutes. The bars will be done when they turn a uniformly rich golden color. Cool and cut.

my notes....
i used 2 cups of chips-white chocolate, butterscotch and mini semi sweet. i think these would be killer good with peanut butter chips and cranberries?
and i always throw in extra nuts. i used pecans chopped small for the inside and broken larger pieces for the top.

Thursday, 4 February 2010

0 Impossible Cheeseburger Pie

IMPOSSIBLE CHEESEBURGER PIE...

not so impossible...quite easy in fact.
whip this baby up for Super Bowl Sunday.
it's perfect for that "BIG GUY" breakfast - brunch on game day.

i'll make this quick. it seems my writing "teck neek" (technique) seems to ruffle a few feathers, so let's keep it short and to the point. this blog is meant for FOOD, PHOTOS, lots of FUN and most of all, SHARING. that's the way i look at it so i hope you do to. now...let's get in the kitchen and get stuff dirty!!!

on with the Cheeseburger Pie...i mentioned Impossible Pies last week when i posted about the Ginger Orange Custard Squares. well, since then i have made the Impossible Enchilada Pie (will post later) and this Cheeseburger Pie. both are fabulous, but this Cheeseburger Pie is a winner. i think i liked it best for it's simplicity and the fun factor of a burger in a pie. my first slice was devoured served over a nice crisp salad, but i think for a party it would be fun to serve with all the sides and condiments that you would serve with burgers. like a bacon, avocado cheeseburger?...with some diced green chilies? homemade relish? caramelized onions?...well, obviously you could go a little crazy. like i said, i totally enjoyed the simplicity of it on it's own if your not into all that extra work of slicing, dicing and dishing.

did i forget to mention this is LOW-CARB and LOW-FAT??? !!!

IMPOSSIBLE CHEESEBURGER PIE

adapted from Ellen's Kitchen

i decided to make this a bit more healthy by using ground turkey, 1/2 cup nonfat-1/2 cup whole milk and substituting 2 egg beaters and 1 egg white for the 2 whole eggs. i also used reduced fat sharp cheddar cheese. season the ground meat to your taste. i used cumin, Mex. chili powder, garlic salt and a bit of oregano.
(original recipe below)

2 cups (1 lb.) cooked ground beef

1 cup chopped onion

2 finely chopped garlic cloves (optional)

1 cup milk

1/2 cups baking mix

1/2 teaspoon salt

2 large eggs...use real eggs, it's better

1 cup shredded Cheddar cheese

Heat oven to 400 degrees. Grease 9-inch pie plate. Cook ground beef and onion until beef is brown, drain. Stir in salt. Spread in pie plate, sprinkle with cheese. Stir remaining ingredients with fork until blended. Pour into pie plate. Bake 25 minutes(30-35 at high altitudes) or until knife inserted in center comes out clean. Makes 6 servings.

IMPORTANT NOTE...mine was definitely NOT done after 25 min. it was, however, getting nice and brown on top. when i stuck the knife in it was really wet so i tented with foil and kept it in for approx 10 minutes longer. just make sure you do the test because the top can be deceiving. also i let mine set for about 10 min before cutting and serving.

Variation: IMPOSSIBLE MEXICAN PIE: Season cooked drained hamburger with taco seasoning mix. Add 1 small can (4-6 ounces) drained diced green chilies. Garnish finished pie with chunky salsa and sour cream.

APROX. nutrition for 6 servings
using 85%-15% ground beef
2% milk
low fat Lifetime sharp cheddar cheese
real eggs

calories...268
fat...14.1g
sodium...477mg
carbs...11.8g
fiber...1.4g
protein...22.4g
calcium...24%


back to top //PART 2