Showing posts with label sweets. Show all posts

Friday, 17 August 2012

0 Vanilla Bean Cardamom Buttermilk Pound Cake


buttery soft
fabulous texture
tight crumb
flawless appearance
fan favorite

POUND FOR POUND...THIS ONE'S A WINNER

except this one is a 1/2 pounder

8 oz butter...8 oz flour...8 oz sugar
almost 8 oz eggs
and a few other essentials.


like i've said before...i don't think there is a bad pound cake...butter, sugar, flour and eggs is all you really need for the classic pound cake.   this one is almost true to the old school measurements, but has a few extra ingredients.  the vanilla cardamom combo is subtle and delicious.  be careful with cardamom...it is very easy to over do it...it can get perfumie and overwhelm your baked goods. 

this is not the last of the pound cakes you'll see this month... 
i have a few up my sleeve and i'll just keep making them, one after the other.
the problem IS...no one in this house is as fond of "the pound cake" as i am.  
i think my fondness of pound cake is bordering on obsession. 

i consider the cake a blank canvas.  not only is it a good showcase for homemade jams.  it goes with anything and can be transformed into anything.  from a quick breakfast bread to a beautiful trifle...tucked in a school lunch or served at the big soiree.

i DO have a couple important suggestions for maximum enjoyment of your favorite pound cake...

of course a slice warm out of the oven is fabulous with the delicate inside and crunchy exterior, but i like to...
let the cake rest over night.
cut the cake chilled for nice clean sharp slices.
let come to room temperature.
or to really wake up the flavors...
lightly, i say lightly, butter and saute each piece as if you were making a grill cheese sandwich...

HEY !!! not a bad idea...

GRILLED CHEESE POUND CAKE SANDWICHES ???!!!

i know it's been done...no new idea is ever a NEW idea...but...
how about a sweet rosemary pound cake ...grilled with brie and granny smith apples or a nice crisp Bosc pear...YUMMM !
to be continued...


VANILLA BEAN - CARDAMOM 
BUTTERMILK POUND CAKE
slightly adapted from Jennie's Kitchen

8 oz butter, softened
8 oz, sugar
8 oz, flour
1.2 tsp salt
1/2 tsp cardamom
3 large eggs, room temp.- slightly beaten
1 whole vanilla bean, scraped
my vanilla bean was quite dry so i added 1/2 tsp vanilla paste
 1/3 cup buttermilk, room temp.

preheat oven to 325 F degrees.  butter a 9 inch loaf pan.
whisk flour, salt and cardamom in a medium bowl and set aside.
combine eggs, vanilla bean seeds and buttermilk, set aside.
in a stand mixer fitted with paddle attachment, beat butter and sugar until light and fluffy.
add half of the flour mixture and mix on low until just combined.
pour half the egg mixture and mix again until just combined.
repeat with remaining flour and then egg mixture.
do not over mix.

scrape batter into prepared pan and bake for 70 - 75 minutes or until deep golden brown and toothpick or metal skewer inserted comes out clean.

again...let your pound cake rest for a day.  i always chill my cakes for easy slicing.  serve at room temp...
then store the cake in the fridge.  leftovers?...when ready to serve...slice chilled out of the fridge, give it a light saute in a hot skillet with just a brush of butter.  the middle stays soft while you get a good light brown crisp on the outside.


i just noticed that the picture above looks as thought the heavens opened up and this fabulous cardamom cake appeared...maybe it did,  this cake is THAT good.


Thursday, 5 April 2012

0 Japanese Cheesecake with Ginger White Chocolate Ganache


oooh, the Japanese Cheesecake.

ever so hard to master the perfect cake, 
ever so delicious when you get it almost right.
and if this is almost right...i'm good with that...for now.


covered with a GINGER WHITE CHOCOLATE GANACHE...
it's a whole new ball game...

on it's own the cake is fabulous, light and airy, but matched with the rich ginger chocolate ganache it makes an even more fabulous decadent dessert...perfect for any special occasion.


this particular recipe is baked in a round spring form pan, but i think it is traditionally presented in rectangular servings.  to get the rectangles you lose a bit of cake, but throw some ganache on the funny shapes and i assure you, nothing will go to waste.
i consider those little scraps..."abstract petit fours".


as shown in the photo above you can see 
i have not conquered the perfect Japanese cheesecake.
i followed the instructions and tips from Little Teochew's fabulous blog post, but as she mentions over and over again in the comments...it's all in the egg whites.  i DO know how to whip a good egg white, but i think it takes practice to get it just right for this cake...AND PRACTICE I WILL.  i love this cake... light texture, slightly moist, holds up very well, cuts crisp and clean and works as a great blank canvas for ganache and other flavorful toppings.
photo on the left shows the shrinkage that i encountered.  this is something one tries to avoid, again, by following the tips from Little Teochew...and the photo on the right is a different kind of bain marie method.  instead of putting your cheesecake in the bath and risking leakage into the cake you set small dishes of water in the corners of the oven.
   

Japanese Cheesecake Recipe please go to Little Teochew's blog.  read all the comments and follow her instructions to the "T".  you might not have the perfect cake, but i guarantee you will have a delicious cake.

GINGER WHITE CHOCOLATE GANACHE

6 oz. good white chocolate, chopped.  i used Guitard white chocolate.
1/2 cup heavy cream (plus 1-2 Tbsp extra that gets lost to the pan and strainer)
1 heaping Tbsp. minced fresh ginger.
(you might need to make more (like 1/2 again) if you are doing total coverage of the cake)

put chocolate in heat resistant bowl.  set aside.
slowly heat your cream and ginger in a small sauce pan...stirring to almost boil.
pour hot cream/ginger through a strainer over chocolate in bowl.
let sit for a moment then begin to stir until all the chunks have melted.  i needed to set this over a double boiler i had ready just to melt the last chunks.  i found that i needed to stir vigorously towards the end because white chocolate acts different than regular chocolate.  it wanted to look separated.  if this happens just whisk until it comes together.
let it cool slightly so its not piping hot.  the hotter it is, the thinner your coating will be.  i like to have my cake slightly chilled when going for the "drip down the sides look".
if you want total coverage i suggest you put the cake over a cooling rack.  try to pour over the cake in one fell swoop...with ganache it needs to be one big pour for a smooth finish...no going back for a re-touch...that's why i like the drip method.  there is a little more leeway.

let sit to set...or chill in fridge for a more firm set.
i prefer the cake with ganache after it has set in the fridge.  it will have a slight dull finish, but after you bring it out and by the time you serve it should retain a slight beautiful sheen.
photos are after it set in the fridge, so you can see the sheen came back.

PS...if you have ganache left over...rewarm over double boiler.  you will need to whisk vigorously because of the separating i mentioned above.  i thought the left-overs were a gonner, but after whisking it came together and worked well for my "Abstract Petit Fours".


Wednesday, 14 March 2012

0 Rose Shortbread Cookies with White Chocolate


Buttery, crisp, smooth and delicious..Shortbread Cookies

i call them SHORTIES

i've been testing out some (lots) of shortbread recipes lately and i will pass them on, but for now i'll start with one of my favorites...

ROSE WHITE CHOCOLATE SHORTIES 

  for this recipe i think you'll find just the right balance of rose, vanilla and, of course, butter.  i really wanted the rose flavor to shine, but not over power. i have tried cooking with rose water, but it just doesn't have enough flavor...besides you can't add water to shortbread dough.  i have tried using just rose petals...they give a good appearance, but again...no flavor.  i finally broke down and bought some good rose extract.

well aware of the possibility of ending up with little soap bar tasting cookies i thought i'd better go with a light touch for the extract.  for this size recipe i am happy to say i was right on with 1/2 tsp.  i'm the type of person that always adds a little extra vanilla when called for, but this time i knew better.

these little gems were a huge hit amongst my foodie friends and i will definitely be putting this in the favorites pile.  they are reeeeely delicious and something unexpected from a simple unassuming shortbread.  oh...and a slight touch of white chocolate?... pushed it over the edge. 


the shortbread base recipe has been my "go-to" for quite a while.  i pulled the essentials from an Espresso Chocolate Chip Cookie recipe from Smitten Kitchen who i think got it from a Dorie Greenspan recipe. some shortbreads are good...i think this one is great...using powdered sugar instead of granulated.
a few of my other flavor combos have been...Haute Chocolate Shorties (spicy double chocolate) , Maple Pecan and Coconut Double Chocolate.  AND, as i mentioned i have a few more winners in my back pocket almost ready to post...stay tuned...i hope.

as you can see in the photos the cookies hold their shape very well...if handled properly.  the dough must be cold and i like to give them a quick chill on the cookie sheet just before going in the oven. 


ROSE with WHITE CHOCOLATE SHORTIES

2 sticks unsalted butter, room temp.
2/3 cup powdered sugar, NOT sifted
1/2 tsp vanilla extract
1/2 tsp rose extract
1 Tbsp crushed edible rose petals, chopped fine...use your judgment.  it's more for the visual effect.
2 cups all purpose flour
white chocolate for drizzle or a slight brush on the bottom

in a mixer with paddle adjustment add butter and powdered sugar.  mix for approx 3 minutes until smooth and creamy...no lumps. add the vanilla and rose extracts along with the rose petals and blend until combined.  add flour to incorporate.  do not over mix.
NOTE...here's a fabulous trick i learned from Smitten Kitchen (love her for passing it on)...
transfer the dough into a 1 gallon Ziploc freezer baggie.  work the dough down into the corners so there are no air pockets.  seal the baggie, but leave an inch or so open for the last of the air to escape as you are rolling the dough.  now roll out the baggie full of dough so it is flat and the dough has completely filled the baggie.  flip the baggie a few times during rolling so as not to get all bunched up on one side.  roll it evenly and it should be about 1/4 inch thick all over.  now refrigerate on FLAT surface for at least 2 hours.  i have left mine for 2-3 days.

preheat your oven now to 325 F degrees
line 2 baking sheets with parchment paper.
try to work quickly and keep the dough chilled
get your Ziploc dough and cut down the sides of the baggie...unzip the top and peel back top layer from dough.
with a long knife cut 6 across and 6 down for 36 nice size cookies.
NOTE...don't use the sharpest knife in the kitchen to cut your squares.  you don't want to cut through the bottom layer of plastic.  remove squares from bottom layer of baggie with a spatula or by carefully peeling off and place on parchment.  they can be fairly close because the don't spread, but do leave a little room for expansion.
place filled cookie sheets (both sheets if they will fit) into the refrigerate for about 10-15 minutes.
NOTE...i cook one sheet at a time to insure even cooking...

bake for 18 - 20 minutes.  keep your eye on them because you can go from a pretty butter color to brown edges if you turn your back too long.  they should be just golden with a slight light brown edge.  pull them from the oven and slide the parchment from the hot cookie sheet onto a flat surface.  let cool to the touch then onto a wire cooling rack.  when completely cooled they can be stored in an airtight container for at least a few days or until you are ready to decorated with the white chocolate if you choose to do so.  don't get heavy handed with the white chocolate.  you don't want to over power the delicate rose flavor.


Monday, 9 January 2012

0 Dump Pound Cake


HI...HI...HI...HELLOOOO...
sorry i took so long to get a post out.
i have been so darn sick...
my caviar for New Years is still in the fridge and i never had my black eyed peas.  not to worry, i know i'll get to it.   i need all the luck i can get.

meanwhile, i could not stay out of the kitchen even sick as a dog...
come to think of it...how sick can a dog get?...

so...i'll have a few tasty interesting things posted soon, but in the meantime i thought this "Dump" pound cake was pretty good. i think i'm a new fan of dump cakes...
dump everything in a mixer, let'er rip and start in a cold oven...
an absolute NO BRAINER...i think that's what we all need after the holiday baking extravaganza.
it's too easy not to give it a try and it's a simple recipe to have on hand for those unexpected visitors that expect homemade baked goods when they "pop by for the weekend".

pound cakes in general can be the perfect vehicle for so many treats.
for instance...

use it as french toast for Sunday brunch.

cut into lady fingers and make a quick fresh fruit Triffle.

how about a dessert panini with chocolate, peanut butter and bananas...or marshmallows.

cut into cubes and toast as you would croutons then layer in a parfait with vanilla cream and berries.

slice and saute with brown butter and serve warm with a cold scoop of ice cream and ooozing warm caramel sauce.

or...just a simple slice and a cuppa afternoon tea.
  
i think there should always be a pound cake in the freezer or a Dump Cake recipe in you repertoire.


ELAINE'S DUMP POUND CAKE
many thanks to the submitter, Carol Pellegrinelli, but i wish i could also give some props to "Elaine"
thanks Elaine's where ever you are...

2 cups flour (i used 2 1/4 due to the comments on original)
1 1/2 cups sugar
1/2 pound butter (1 cup), softened
2 tsp baking powder
4 eggs, room temp.
1/2 cup milk
1 tsp vanilla extract
note...i added 1/3 tsp lemon and 1/3 tsp lavender extract
plus 1 rounded tsp lavender buds and a little lemon zest

put ingredients in bowl of stand mixer.  MIX FOR 20 MINUTES.  coat tube pan ( i used an Angel Food Cake pan) with vegetable spray.  put batter in pan and place in a COLD OVEN.  set oven to 350 F degrees and bake for 1 hour.  check with toothpick...i think mine could have used just a few more minutes.


by the way...this is one of many pound cakes i have tried recently and i was pretty pleased.  like i mentioned...it's just too easy not to try.  this one had the perfect texture and was nice and dense, not cakey...
i don't want cakey with something called a POUND CAKE !
one thing i might add is that it could use a little more flavor...i was a bit shy with the lemon and lavender...i think vanilla bean would add a nice touch if going for plain or add some mini chocolate chips?...


Saturday, 24 December 2011

0 Merry X-mas from me and my Ginger Peeps to you and yours


IT'S JUST NOT CHRISTMAS 'TIL I BITE THE HEAD OFF A GINGERBREAD MAN !


i hope you all have a delicious and wonderful feast where ever you find yourself this holiday.

thanks everybody for following along with all the fabulous comments.  i love it when i get feedback after a tested recipe or new information on something you've done different or even better!.  when i see a new follower or get a new comment on my emal it absolutely makes my day and keeps me going out there to find new and fun recipes to bring to the table.


MY FAVORITE "GO-TO" GINGERBREAD MAN RECIPE...
nothing fancy...classic taste and they hold up very well for days and days.
from good ol' Betty Crocker
if you don't have a tattered old three ring binder of Betty's recipes somewhere in your library of cookbooks...then you can find the recipe  HERE at Betty Crocker's website.

these little guys and gals AND piggies are definitely a labor of love, but well worth the giggles as you are decorating and the huge smiles you'll get giving them away.

i hope you put her recipe in your files for next year's holiday treats.


Sunday, 11 December 2011

0 Giada's Parma Carrot Cake


this unassuming simple looking cake is...

SIMPLY DELICIOUS !

a new favorite carrot cake is on your horizon...trust me


this is a carrot cake like i have never tasted...not too too sweet like a lot of carrot cakes.  you can actually taste the sweetness from the carrots.  the pine nuts give it a buttery texture, you get a hint of fennel and the lemon just wakes everything up.  all those flavors combined create this very unique dessert.


i caught this on the Food Network show, "the Perfect 3".  Ina Garten and her perfect Classic Chocolate Cake, Paula Dean with her Red Velvet Cake and then there was Giada De Laurentiis with this interesting Parma Carrot Cake that caught my attention.


i DO love carrot cakes but sometimes they can just be over powered by spices, stringy carrots and cloyingly sweet with cream cheese frosting.  when i saw her adding fennel seeds and pine nuts i immediately pushed the record button and googled the recipe.

this is a definite winner and a "must-try" recipe.  the cake is versatile...can be baked in different vessels and served any way you choose.  serve as a star quality dessert or a simple tea cake...enjoy for breakfast brunch or snack...a warm frothy cappuccino or just a spot of tea...
IT'S DELICIOUS ON IT"S OWN !


PARMA-STYLE CARROT CAKE
recipe courtesy Giada De Laurentiis
i have copied it for you below with my slight changes in italics

2 1/2 cups all purpose flour...i substituted 1 1/4 white whole wheat flour
1 Tablespoon baking powder
1/2 tsp ground cinnamon
1/2 tsp salt
1 cup pine nuts (about 6 oz.)
1/2 cups sugar, plus 1/2 cup sugar...
NOTE...i mixed 1/2 cup splenda with 1/2 cup sugar and separated that.
also...on the show Giada did not separate the sugar.  she creamed the butter and the 1 cup sugar.  i did as the written recipe, so either way will work.  no need to separate...
1 tsp fennel seeds
1 lemon zested and juiced
2 cups peeled, shredded carrots (about 6 carrots)
1/2 cup mascarpone cheese
1/2 cup (1 stick) butter, softened
5 eggs
powdered sugar for garnish

preheat oven to 375 F
in a medium bowl stir together the flour, baking powder, cinnamon and salt.  set aside

place the pine nuts, 1/2 cup sugar and fennel seeds in a food processor and pulse to mince the nuts.  add lemon zest, lemon juice and the shredded carrots.  pulse to mince the carrots.  add the mascarpone cheese and pulse until cheese is incorporated

in a large bowl, using a stand mixer, cream together the butter and remaining 1/2 cup sugar.  add the eggs one at a time, until well combined.

add the carrot mixture to the butter mixture and stir until combined.  add the reserved DRY ingredients in 3 intervals and stir until just incorporated.

place the mixture in a slightly greased and floured 8 x 10 by 2 dish
NOTE...i used a 9" springform pan.  2 loaf pans might work well for serving as a sliced tea cake.  on the show Giada used some star shaped baking paper molds.

bake for 55 - 60 minutes...golden brown on top and toothpick comes out with a slight crumb.
let the cake cool for 1 hour, then lightly dust with powdered sugar.

i let the remaining cake sit out over night, then refrigerated it.  this cake keeps well for at least a few days.  bring to room temp before serving.  (great treat for breakfast).


Friday, 2 December 2011

0 Francois Payard's Flourless Chocolate Walnut Cookies


few words to say about these cookies except...

WOW...CHOCOLATE WHAM !

the best compliment in the world came from my ever so  fabulous chocoholic mother, who just so happens to be my greatest 'constructive' criticizer...

at first i hear nothing...silence.  then...

"hmmmm...this tastes like one of those $5.00 cookies"


these little, or rather large, gems have been around the block a few times and i have made something similar a while back, BUT i have never used this recipe and exact method...and i made sure i used grade A fabulous Dutch cocoa powder.  well worth the trip to the culinary store (SLT) to get the good stuff.


like i said...few words.  not only do i implore you to add these to your holiday treat list, BUT these are so easy to make, they are a huge chocolate lovers dream AND a big hit for those GLUTEN-FREE peeps that often have to miss out on a good thing.

a few quick notes...
do not over beat.  this should be a little runny, gooey and sticky.
when taking them off the parchment...peel them as though you are peeling an annoying sticky price tag off.  these DO stick to the parchment a bit...so don't be in a rush with the spatula. 
these keep well if completely cooled and stored in an airtight container.  do not stack.  i put a double piece of parchment in between the layers and was very careful not to put one directly over the other.
they get chewier the second day, but still have a crisp to them.


FRANCOIS PAYARD'S FLOURLESS CHOCOLATE- WALNUT COOKIES
recipe found here and copied for your convenience below

2 3/4 cups walnut halves...i only had about 2 cups
3 cups confectioner's sugar (powdered sugar)
1/2 cup plus 3 Tbsp. unsweetened Dutch-process cocoa powder
1/4 tsp salt
4 large egg whites, room temp.
1 Tbsp (TABLESPOON) pure vanilla extract
i also added 1/3 cup chopped dark chocolate...GOOD for extra WHAM factor.

preheat oven to 350 F. to toast your walnuts.
lay your walnuts out on a sheet pan and toast your walnuts, approx. 9 minutes.
(i did them in my Breville Smart Oven on # 2)...watch them closely.
let the walnuts cool and coarsely chop.  set aside.
position racks in the upper and lower thirds of the oven and...
LOWER THE TEMP. to 320 F.
in a large bowl, or on low in a stand mixer,  whisk the powdered sugar, cocoa and salt followed by the chopped walnuts.  while whisking, turn your speed to medium and add the egg whites and vanilla extract.  beat until just combined.  DO NOT OVER BEAT OR THE BATTER WILL STIFFEN.  
spoon the batter onto parchment lined cookie sheets.  Francois says 12 evenly spaced mounds...i got 8 per tray (2 trays) and did a second baking with 4, making 20 total.  as you can see mine were fairly large.  
bake them for 14 - 16 minutes until the tops are glossy and lightly cracked.  shift the pans bottom to top and front to back halfway through to ensure even baking.
slide the parchment paper with the cookies onto 2 wire racks and cool cookies completely before attempting to remove. 
as stated above...don't rush to use a spatula.  these will be semi stuck to the parchment.  peel the parchment slowly from the bottom of the cookie.
store in airtight container.  do not stack without parchment or something in between.
i know they will disappear quickly, but i kept a couple aside and the 3rd day they were still outstanding.


Thursday, 7 July 2011

0 Yogurt and Apricot Pie with Crunchy Granola Crust


once again, i was googling for some healthy cheesecake alternatives and i came across this one from Food and Wine...it's quite delicious...sweet, tart, fresh and creamy with a crunchy oatie crust...
you might want to consider this a "HEALTH-IER" treat.  although it is sweetened with a bit of sugar and preserves, it does contain yogurt with all it's probiotics, the benefits from old fashioned oats and the omegas from almonds.


if you are looking for a truly healthy low-cal dessert i would not consider this one ultra healthy, but very tasty and a good alternative to a heavy cheesecake.  (oooh how i do love me some real cheesecake!)

i adapted the recipe just a smidge by adding a bit more oats to the crust and i used whole wheat white flour...for some reason the words whole wheat flour and oats trick me to think i am being healthy.  i like to eat my sweets for breakfast so this was a perfect sweet treat to start my day without too much guilt.
this would be a great dessert to finish off a fabulous summer Sunday brunch...a light fresh pie and with a few slices of fresh apricots your set for a bright summery treat.


Yogurt and Apricot Pie with Crunchy Granola Crust

INGREDIENTS
3/4 cup whole wheat white flour
1/3 cup sugar
1/4 cup sliced almonds, crushed
1/2 cup rolled oats, old fashioned
dash of cinnamon
pinch of salt
2 Tbsp unsalted butter
1/4 cup canola oil
1 cup non fat plain Greek yogurt
2 lg eggs, lightly beaten
1/4 cup sugar
3 Tbsp fresh lemon juice
1 tsp pure vanilla
1/2 cup warmed apricot preserves

preheat oven to 350 F
in a large bowl, combine the flour, sugar, almonds, oats, salt, cinnamon.  in a large skillet melt the butter and oil.  add the granola mixture and cook over medium heat, stirring continuously until golden, about 5 minutes.  transfer to a 9 inch pie plate and let cool slightly.

using a flat bottomed glass, gently press the granola evenly over the bottom and side of pie plate to form a 1/2 inch thick crust.  freeze the crust for about 10 minutes, until completely cooled.

NOTE..this crust is a bit difficult to get perfect...it's crumbly, but do your best.

meanwhile, in a bowl, whisk the yogurt with the eggs, sugar, lemon juice, and vanilla; whisk until smooth.  pour the filling into the pie shell and bake for 25 minutes. until the filling is set, but the center is still slightly jiggly.  let the pie stand at room temperature for 5 minutes.  pour the warm apricot preserves on top of the yogurt and gently spread in an even layer.

refrigerate until chilled, at least 2 hours.  using a warm knife, cut the pie into wedges and serve.


Sunday, 24 April 2011

0 Mocha 'spresso On-The-Go Jello


forget those 5 hour energy drinks that cost a fortune.  make yourself some Espresso jello cups for those inconvenient times you need a pick-me-up.


i love these things...my friends love these things...you will love these things.  i think i've already made about 5 batches and i'll make more tomorrow.


i got this idea from Nicole at The Galley Gourmet.  in the post titled "Sunday Dinner" she had this fabulous photo of Chocolate-layered Espresso Jellies.  her recipe sounds absolutely delicious and a perfect end to a fabulous Sunday Dinner.


i, on the other hand, don't throw too many lavish dinner parties...none, if truth be known, so i came up with this easy Mocha 'spresso On-The-Go idea.  how much fun would it be to whip an espresso shot out of your brown bag lunch?...or pass these out at your next tailgate party?  try this for an afternoon pick-me-up or an after dinner guilt-free treat.  these are pretty guilt-free...just a little shaved dark chocolate never hurt anyone.


MOCHA'SPRESSO JELLO TO GO

below are the instructions for the way i have been making it, but of course, there are many many variations.  have fun with it...

makes 4 1/2 cup servings
1 packet of plain gelatin (7g per packet)
1/4 cup cool water
3-4 shots of espresso (equal to 3/4 cup)...HOT-reheat if you have to
1 cup vanilla protein drink (milk would probably work, but the protein drink is creamier, extra flavor, less calorie and low carb...Muscle Milk or Pure Protein are good)
sweetener to taste
(a splash of no sugar Hazelnut or Irish Cream sweetener is great.  i use Davinci's)
dark chocolate bar for shavings

NOTE...whatever espresso/protein drink/milk/water combo you use your goal is to end up with 2 cups of liquid. this can be like a straight up espresso shot or a flavored latte.  you want the liquid to taste as you would a favorite coffee/espresso drink, but a little more rich.  most friends liked the one with a little more latte flavor, but the straight up espresso was brilliant, if ya ask me...

pour 1/4 cup cool liquid (milk, protein drink, water) into a 2 cup pyrex measure.  add the gelatin packet and let the gelatin bloom for about 5-10 minutes.  stir it so that it doesn't clump up.  if it clumps, use a fork or spoon to mash clumps...a few little clumps are okay.  
pour your hot espresso into this gelatin mixture and stir until the gelatin has completely dissolved.  do a taste test...is it sweet enough?...remember this is a treat.

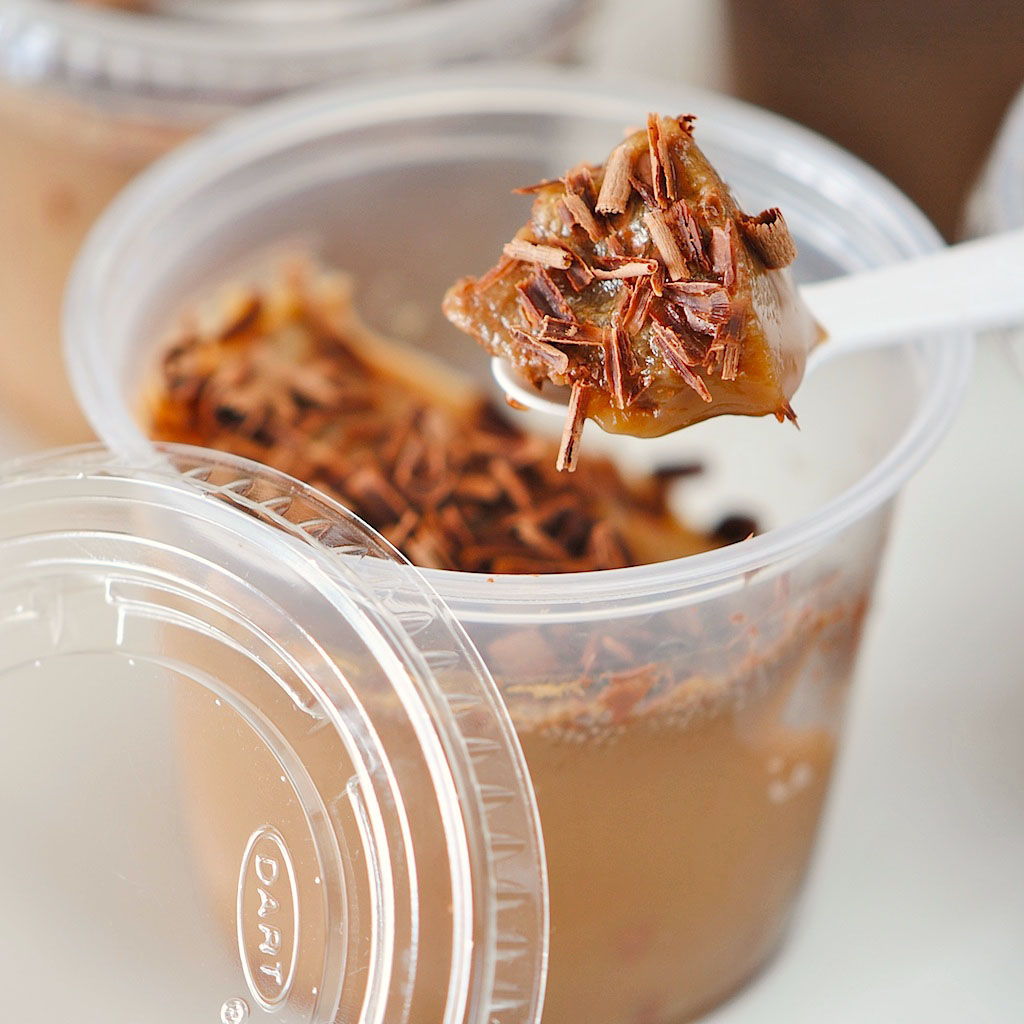
shave a little chocolate into the vessel of choice.  i got these little toss aways at Smart and Final.  reusable tupperware would be more green of me, but i never get them back and people tend to throw those away. i reuse these as much as possible.

pour the mixture in the cups and refrigerate until firm...takes a few hours

shave some more chocolate on top and you're ready to go...ANYWHERE

A POWERFUL LITTLE PICK-ME-UP TREAT !


Saturday, 2 April 2011

0 Flan Cake. Totally worth it !


all i can say is OMG !!!

absolutely CARAMELICIOUS !!!


i might have just found the 8th wonder of the world...
the answer to all ones problems...(at least mine)
the reason for all things being...
this could actually be 
THE BEST THING SINCE SLICED BREAD !


do i like this cake...why, yes, i DO
do i suggest you make this cake...yes, i DO !!!

as you might know, i did try to make a Flan Cake last week.  total Flan Cake FAILURE as seen HERE.
i knew the idea of this cake sounded fabulous, but i had no idea it was going to be this good.  as i mentioned in the "failure post" i wasn't going to give up and i'm glad i didn't.   i tried a different recipe.  i think the first one had the wrong milk to egg ratio, but of course it could have been cook's error as well.

this recipe is pretty easy.  if you break it down it's all simple stuff, but you just have to have some patience and some faith.  if you intend to have it for a dinner party i suggest you start it in the morning or it can even be made the day before.  i had to let mine sit overnight because dinner was canceled.  the cake is easy to throw together, then bakes for about an hour, cooled down for another hour, then goes into the fridge for a couple of hours or over night...then before serving it comes out of the fridge and needs to come to room temp for about 2 hours.  this is where the patience comes in play.  FAITH?...you need it for the final unveiling...hoping that everything has cooked through and set properly.  no worries with this recipe if you follow it as i did.  
by the way...many thanks to the original blogger at What's Cookin, Chicago?
Joelen calls this a Tres Leche Flan Cake.  i'm not quite sure where the "Tres Leches" comes into play, but i love the secret ingredient of Coca Cola.  i think it's the perfect thing to add that extra caramel-ness to the store bought box cake.  i bet no one would ever know the cake part came from a box.


so...on with the recipe?...
i usually copy the recipe for your convenience, but this time i don't want to miss a step or make some typo that would send your cake to the failure pile like my first one...

BUT i will give you my few tips i think are necessary for success.
you might want to cut and paste these tips for the actual baking day.

1.  make sure you preheat your oven well
2. important....the time and temp works best for a regular oven setting...not convection.
3.  while prepping the cake, put some water on to boil for the bain marie.
4.  don't go overboard with the caramel in the bottom of the pan.  as you can see in my photo vs the original photo of Joelen's, my cake had a little dent on the top from the caramel ring....not a bad thing by any means, but you can always add some on after it is unmolded.  i found the real caramel called Cajeta de Leche at a Mexican market.
5.  DO use the Coke to replace the water.  i did NOT use the full can.  i used the amount the cake called for
6.  for the bain marie...make sure you put your bain marie vessel (i used a roasting pan) in the oven while it is preheating.
7.  put your cake in the bain marie pan and fill the bain marie with almost boiling water.
8.  after the long 2 hours of bringing it to room temp after refrigeration, you will have a pool of soupy caramel in the middle of the bundt pan...do not be alarmed.  either before or after you unmold the cake you should scoop this out with a small ladle and save for pouring over the cake.  if you don't, when you slice it you could have quite a flowing gush of caramel on your cake plate.

so without further adieu...
i give you the link to one of the best cakes i have ever made and ever tasted !

from Joelen at What's Cookin' Chicago?
the instructions are very well written and easy to interpret.
she also has a printer friendly app that come in handy.


back to top //PART 2