Showing posts with label snack. Show all posts

Wednesday, 17 August 2011

0 Indian Spiced Nuts


i've gone NUTS !!!

sometimes you feel like a nut...
and sometimes you feel like A LOT OF NUTS !!!
 i'm addicted.  i have loads of them every day.  i even put these and the Mexican Spicy flavored ones on my yogurt and fruit in the morning.
i eat them with chocolate...i eat them with cheese...
i give them away in nice little jars...just so i can make MORE NUTS !

why nut?(not)...they're good for ya !

i've made these about 5 times so far, tweeking it as i go, and i think i've come up with a good flavor mix.  it might be a bit spicy for some, so i suggest you use your judgment...maybe leave out the cayenne and or tone down the chili powder.  by the way, as i mentioned in the recipe please don't use regular chili powder that you would add in chili.   it will over power the garam masala.  read the label and see that it is only ground chilies...i get mine at the Mexican market, Northgate in Santa Ana or the Persian market, Wholesome Foods in Irvine.

this method for glazed nuts using just 1 egg white (plus sugar and spices) seems to work really well.  as you can see, the nuts have a nice glazed look, but without the stickiness that can happen with heated sugars, syrup and/or honey.
it is so easy, i make up a few batches at a time and change up the flavors.  i've posted about the Mexican Spiced Nuts and will probably post about the Snickerdoodle Nuts soon...they get eaten up quickly.


INDIAN SPICED NUTS

3 - 3 1/2 cups raw mixed nuts...your choice
(i use pecans, almonds, walnuts, cashews, pistachio, pumpkin and sunflower seeds)
6-8 dried apricots, small diced...OPTIONAL...see note
1/2 cup white granulated sugar
1 extra large egg white beaten until white and fluffy
1 Tbsp garam masala
1 Tbsp chili powder...(you might use your discretion...it can get HOT)
REAL chili powder, not the kind you put IN chili...i use Mexican ground chili
1/2 tsp cinnamon
1/2 tsp cumin
1/4 tsp ground ginger
a dash or two of yellow curry
a dash of coriander
1/2 tsp cayenne...OPTIONAL
2 full sprigs oven dried rosemary, crushed into pieces...see notes
fine sea salt to sprinkle before oven

preheat oven to 350 F degrees...throw your fresh rosemary sprigs in for a few minutes
lightly spray a baking sheet (with sides like a 1/2 sheet jelly roll pan) with non stick spray.  in a small bowl combine all the spices and sugar.  in a large bowl whisk the egg white until white and foamy.  add nuts to the egg white and about a 1/3 of the spice mixture...sir well to coat.  add another 1/3...stir to coat. finish with that last 1/3 and stir until it looks as though everything is evenly coated.  sprinkle in your crushed rosemary as you are stirring...you don't want this to clump into one spot.

spread evenly onto baking sheet and sprinkle with sea salt.  bake for 20 minutes.  take them out and stir them up and separate them a little.  let them rest for a few minutes...then back in the oven for another 10-15 minutes....but watch them carefully so they don't burn.
i find that this second baking keeps them crisp and fresh longer and it dries out the moisture from the apricots.

TIP...do not store them until they are COMPLETELY cooled, but do not let them sit out too long either...they might get sticky.  if they do get a little tacky, just put them back in the oven for a few minutes, let them cool then store again.

NOTES...if using dried APRICOTS you must check them after baking to see that they have sufficiently dried up.  they will prevent the nuts from staying extra crisp and fresh if storing in jars...if you are consuming fairly quickly then they will be fine and they are a tasty addition.
OVEN DRIED ROSEMARY...this tastes much better than store bought dried rosemary  i like to use fresh rosemary and dry it out in the oven...a few sprigs on a sheet pan at 300-320 degrees for about 7 - 10 minutes...or throw it in as you are preheating.

store in airtight jars or containers.
i like to throw in one of those "stay-fresh" packets that come in some store bought snack items...you know, that annoying little packet that looks like sugar, but says DO NOT EAT.
not necessary, but my nutty brain thinks it helps.


Monday, 11 July 2011

0 Vanilla Berry Chai Jello Treat


Stained Glass Jello Dessert made healthy...

i know, i know...we've all seen this one before.  commonly known as stained glass jello, but i bet you haven't tried this version.

it's lo-cal, lo-carb...no fat...NO GUILT...

it's FULL OF PROTEIN...and IT'S FUN !!! 


you see this type of jello dessert a lot in the Mexican markets, but it's usually made with sweetened condensed milk and sugary jello......and i've seen many recipes on the Internet all cute and colorful.  here's an example that i found at Mexicanfoodsandmore.com... BUT all the fun colors and flavors of jello are the pre-sugared ones and i don't see myself eating sweetened condensed milk in solid form anytime soon.

so i had a "light bulb moment"

why not use my vanilla protein drink as the milky base and use sugar-free jellos...
better yet...infuse different tea flavors into the colored jellos.
i dug out the Knox gelatin packets i had in the back of the pantry, put my lab-coat on and went to work.

the results have been delicious.  friends love the cute little squares i dole out and it's always a great conversation piece....
"where'd you get that?...what is that?...how'd you make that?...can i have some?..."
always followed by a big smile and a few giggles


this post is not so much a recipe as it is an idea,...
but i have put the ingredients for the treat i made shown in the photos.  you can see how flavors can easily be changed to suit what you have available.  i found that Worldwide Vanilla Pure Protein 21g or 35g protein (found at Trader Joe's) works well for the base and the Isopure (looks like this) Blue berry flavor worked well with it's icy blue color AND it added 40 more grams of protein to the batch.  look for Isopure at a nutrition store.  you could also try Gatorade G2 Icy Blue Berry or something else colorful.  i DID find that Gatorade wasn't as flavorful...Crystal light has some great flavors...cherry pomegranate is great


EASY PROTEIN JELLO TREAT

8 x 8 glass pyrex dish for finished product
2 cups vanilla protein drink
1 lrg box black cherry sugar free Jello (makes 8  1/2 cup servings)
16 oz of ice blue G2 Gatorade
OR 16 oz of Isopure Blueberry Protein drink
OR another flavor sugar free jello, 1 box
1 - 2 Chai tea sachet
dash cinnamon, cardamom and nutmeg, ginger

let me suggest a link to a GREAT blog post here at The food Librarian.  Mary has some fabulous photos and perfect instructions on making stained (broken) glass jello.  for an easy protein version, just substitute the condensed milk with the vanilla protein drink...NOTE...DON'T USE WATER...bloom your gelatin in 1 cup cold protein drink then heat in the microwave until completely dissolved then add the other cup protein drink and proceed.
use sugar free jello for the colors.
if you want to get creative or expand your flavors see below...

use chai ice tea for the water when making your colored boxed jello

also i like to add a small (small!) dash of cinnamon, cardamom, ginger and nutmeg to the vanilla protein drink.

if you are using another liquid, such as the Isopure Protein juice, Gatorade or what ever...use 2 gelatin packets for 2 cups of liquid....bloom your gelatin in 1 cup cold liquid for 5 minutes, give it a stir then heat in microwave until dissolved.  no need to boil, but don't walk away 'cuz it can over flow...not good.  stir...when completely dissolved add the other cup liquid and stir...pour into flat dish then refrigerate until completely firm.  cut into cubes....

 and again, refer to this great post/link, The Food Librarian, for finishing the project...i would write it all out, but Mary explains it so well and this would just get too long.

i'm sure you get the drift...it's not rocket science....
although you should win a prize for making it to the end of this post.

go wild with some fabulous flavor combos

i think i'll try something with chocolate protein drink?... next week when i'm done with this one.

Friday, 1 July 2011

0 BACON JAM with a little kick


BACON JAM...are you kidding me?
was someone keeping this a secret?
how did i not know about this WONDER SPREAD?!

move over candied bacon...there's a new kid in town


good morning...good afternoon and good night !
i could eat this with every meal...and i think i have.

if you are a bacon fanatic, like myself, i suggest...demand you to try this fabulous easy slow cooker recipe for the sweet savory ride of your life.  it goes with just about anything and everything...wonderful with the apple-peanut butter combo...fabulous with a ripe camembert cheese and a crisp cracker...just the right topping for some toast soldiers and a 3 minute egg...

and on a burger ?  fagetaboutit !


SLOW COOKER BACON JAM
w/chipotle peppers
adapted from Martha Stewart

1 1/2 pound sliced bacon (apple wood smoked is great), cut lengthwise into 1-2 inch pieces
NOTE...if doing it on the stove top i find it much easier to keep the pieces large or whole for easier flipping and even browning.
2 medium yellow onions, diced small
3-4 garlic cloves, smashed peeled
1/2 cup cider vinegar
1/2 cup packed brown sugar
1/4 cup pure maple syrup
3/4 cup brewed coffee
1/2 tsp Mexican chili powder
2-3 chipotle chilies, diced...out of the can with a little of the adobo sauce

1.  cook your bacon until it is browned and the fat is rendered...OVEN or SKILLET...?

NOTE...the 1st time i cooked my bacon, in strips, all at once in the oven...much easier...BUT i lost out on the crispy bacon burnt scrapings that you get from cooking it in the skillet.    the finished product didn't miss the scrapings at all...it was fabulous.  i did a second batch on the stove top to see if there would be a big flavor  difference and i cut the bacon into small pieces...had to do it in 2 batches, took twice as long, kind of messy and kind of a big hassle.  this batch is in the slow cooker RIGHT NOW, so we'll see....i'm leaning towards the oven method and cutting it all into pieces before adding to the pot.

NOTE...i just tried the second batch...the one that i cooked the bacon on the stove top and used all the scrapings.  i did not see any noticeable flavor difference.  i will definitely use the oven method for my bacon from here on out.  i think i could still get some of the delicious scrapings off the jelly roll pan and add them, but like i said, i didn't notice anything worth going through all the trouble of stove top cooking.  i suggest cooking your bacon in whole strips all at once in the oven.

transfer the bacon to paper towels to drain.  pour off all but 1 tablespoon of the fat.  save the rest for future use...like these Bacon Fat Oatmeal Chocolate Chip Cookies perhaps.

Add onions and garlic, and cook until onions are translucent, about 6 minutes.

add vinegar, brown sugar, maple syrup, coffee, chili powder and chipotle chilies and bring to a boil, stirring and scraping the browned bits off the bottom of the skillet (or not if used oven method) with a wooden spoon.
add bacon and stir to combine.

transfer mixture to a 6 Qt slow cooker and cook on high, UNCOVERED, for 3 1/2 - 4 hours, until liquid is syrupy.

transfer to a food processor and pulse until coarsely chopped.  let cool, then refrigerate in airtight containers, up to 4 weeks


NOTE...i, obviously, put mine in airtight clip-top jars...try to make sure there are no air bubbles when loading into jars...that's where the spoilage can form first if you are storing a jar for a few weeks. this is very rich, but UNBELIEVABLY FABULOUS so you might use it sparingly...

or YOU MIGHT WANT TO SLATHER IT ON EVERYTHING !!!

i have a new favorite breakfast now that i have discovered this wonder spread...a bacon jam, peanut butter and fresh raspberry quesadilla.  spread the jam on one side, the p-nut better on the other, add the raspberries to one side and flap over like a quesadilla...talk about a delicious out-of-the-ordinary on the go breakfast...YUM !!!


Tuesday, 28 June 2011

0 Spicy Mexican Glazed Nuts


Oooh...these unassuming little nuggets are...whew!...spicy 
and oh so addicting.


if you want a quick spicy sweet nut recipe, this is a great one.  they turn out really crunchy, slightly glazed and you don't have to do anything on the stove with molten sugar or syrups...a simple egg white along with your spices and a little sugar... in the oven, and the magic spicy glazed coating happens without fail.  these were such a hit with my spice lovin' friends.  i tend to make things a bit spicier than most can handle, and these were just right.  i must say...i used REAL MEXICAN CHILI POWDER.  not the wimpy stuff you buy at a regular market so mine came out extra spicy...AND i used the cayenne.  i suggest you use your judgement on the spices, but if you have a Mexican market near you do yourself a favor and buy the real stuff.  it's cheap and always adds a nice blend of spicy chilies to what ever you're making.


SPICY MEXICAN GLAZED NUTS
adapted from Big World-Small Kitchen and Epicurious

3 cups raw mixed nuts
(i used almonds, pecans, macadamia and walnut)
1/3 cup sugar
1 egg white beaten until white and fluffy
1 Tbsp chili powder
(i used REAL Mexican chili powder...whew!...spicy!)
1 tsp cinnamon
1/2 - 3/4 tsp salt
1/4 tsp ground cumin
1/4 tsp cayenne pepper

preheat oven to 350 F...place rack in the middle

spray baking sheet with non stick spray.  in a small bowl combine sugar and spices.  in a large bowl whisk egg until white and frothy.  add nuts into egg white then add the sugar/spice mixture and stir until everything looks evenly coated

spread nuts evenly onto prepared baking sheet and bake until golden, about 20 minutes.

TIP... i took them out after 15-20 minutes and stirred and separated the nuts...then returned to the oven for approx. 10-15 more minutes.  keep your eye on them.  i think this second baking time helps to keep them crunchy.

TIP... do not store them until they are completely cooled, but do not wait over night to store them.  if they get a little sticky (they shouldn't because of the second bake) you can stick them back in the oven for a few minutes, let them cool, then store again.

TIP... store in a clip top glass jar with a rubber seal


TIP... also i saved some of those little stay-fresh packets you find at the bottom of other snack foods....you know that annoying little plastic pouch that says DO NOT EAT...DO NOT OPEN.  they look like sugar packets...i put one of those in the bottom of the jar if i have one available.  don't know if it does anything, but i made some nuts 2 weeks ago that are still good and crunchy.

trust me these won't last that long...you'll eat them all up, but i made a sweet glazed version for Dad and he doesn't eat them as quickly as i do


Sunday, 24 April 2011

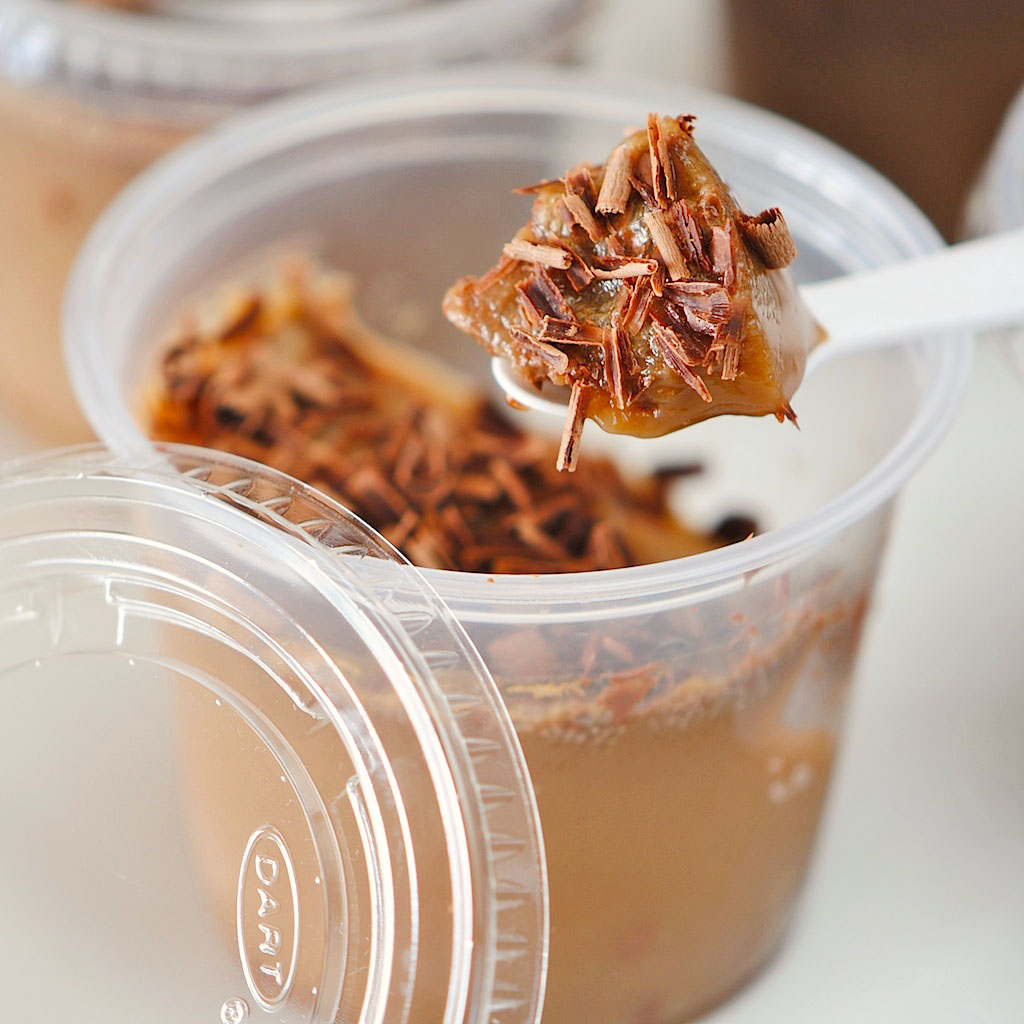
0 Mocha 'spresso On-The-Go Jello


forget those 5 hour energy drinks that cost a fortune.  make yourself some Espresso jello cups for those inconvenient times you need a pick-me-up.


i love these things...my friends love these things...you will love these things.  i think i've already made about 5 batches and i'll make more tomorrow.


i got this idea from Nicole at The Galley Gourmet.  in the post titled "Sunday Dinner" she had this fabulous photo of Chocolate-layered Espresso Jellies.  her recipe sounds absolutely delicious and a perfect end to a fabulous Sunday Dinner.


i, on the other hand, don't throw too many lavish dinner parties...none, if truth be known, so i came up with this easy Mocha 'spresso On-The-Go idea.  how much fun would it be to whip an espresso shot out of your brown bag lunch?...or pass these out at your next tailgate party?  try this for an afternoon pick-me-up or an after dinner guilt-free treat.  these are pretty guilt-free...just a little shaved dark chocolate never hurt anyone.


MOCHA'SPRESSO JELLO TO GO

below are the instructions for the way i have been making it, but of course, there are many many variations.  have fun with it...

makes 4 1/2 cup servings
1 packet of plain gelatin (7g per packet)
1/4 cup cool water
3-4 shots of espresso (equal to 3/4 cup)...HOT-reheat if you have to
1 cup vanilla protein drink (milk would probably work, but the protein drink is creamier, extra flavor, less calorie and low carb...Muscle Milk or Pure Protein are good)
sweetener to taste
(a splash of no sugar Hazelnut or Irish Cream sweetener is great.  i use Davinci's)
dark chocolate bar for shavings

NOTE...whatever espresso/protein drink/milk/water combo you use your goal is to end up with 2 cups of liquid. this can be like a straight up espresso shot or a flavored latte.  you want the liquid to taste as you would a favorite coffee/espresso drink, but a little more rich.  most friends liked the one with a little more latte flavor, but the straight up espresso was brilliant, if ya ask me...

pour 1/4 cup cool liquid (milk, protein drink, water) into a 2 cup pyrex measure.  add the gelatin packet and let the gelatin bloom for about 5-10 minutes.  stir it so that it doesn't clump up.  if it clumps, use a fork or spoon to mash clumps...a few little clumps are okay.  
pour your hot espresso into this gelatin mixture and stir until the gelatin has completely dissolved.  do a taste test...is it sweet enough?...remember this is a treat.

shave a little chocolate into the vessel of choice.  i got these little toss aways at Smart and Final.  reusable tupperware would be more green of me, but i never get them back and people tend to throw those away. i reuse these as much as possible.

pour the mixture in the cups and refrigerate until firm...takes a few hours

shave some more chocolate on top and you're ready to go...ANYWHERE

A POWERFUL LITTLE PICK-ME-UP TREAT !


Friday, 11 March 2011

0 Apricot Almond Oat Bars


since my last post about the "Turkey Tails" was sooo long, i'll get through this one quickly.

i found this recipe while watching some Giada De Laurentiis show in the wee hours of the morning.  while half asleep i heard "healthy" and i heard "oatmeal".  two things i'm always looking for in a good morning snack.  well, i would NOT really consider this a "HEALTHY" recipe with a cup of butter and a cup of brown sugar, but they DO have a good amount of oats, almonds and i used whole wheat white flour...so all is not too too bad...some people would actually call this a "health bar".

the photo above was taken about an hour after baking...yummy, sweet jam gooey-ness with the crunch from the almonds, but kind of squish when you cut them into bars...even with a very sharp knife.

the photo below was taken after refrigerating to set.  i find this makes for cleaner cutting when they are chilled

APRICOT ALMOND OAT BARS
for original check the link.  i made just a few changes that worked quite well.

FILLING
1 13 oz jar apricot jam...i used Bonne Maman Apricot Preserves
8 10 dried apricots diced into 1/4 inch pieces (about 1/3 cup)

CRUST
1 3/4 cup whole wheat white flour
1 cup packed brown sugar
1 tsp cinnamon
1/4 tsp cardamon
a few grates of fresh nutmeg.  maybe a little less than 1/4 tsp
3/4 tsp sea salt
3/4 tsp baking soda
1 3/4 cups old fashioned oats
1 cup coarsely chopped almonds
1 cup unsalted butter...melted
1 egg room temperature...beaten
1 tsp vanilla extract

preheat oven to 350 F.  spray or lightly butter a 9 x 13 inch metal baking pan and line the bottom and sides with parchment so it over hangs on 2 sides for easy removal

in a small bowl mix together the jam and the diced apricots.  set aside.

for the crust...in a large bowl (i did this in my electric mixer.  whisk or paddle works well) mix  together the flour, sugar, cinnamon, cardamom, nutmeg, salt and baking soda.  stir in the oats and the almonds.  add melted butter, egg, and vanilla.  mix until incorporated.

using a fork or clean fingers, lightly press 1/2 dough mixture into the bottom of prepared pan.  try to make it so there are no holes.  using a spatula, spread the filling over the crust, leaving 1/2 inch border around the edge of the pan.  cover the filling with the other 1/2 dough mixture and gently press to flatten.

bake until light golden brown, about 30-35 minutes.  cool for about 1 hour.  cut into bars and store in airtight container or refrigerate.
NOTE...as i stated above, i like to refrigerate to set them a little before cutting.  this makes for a nice clean cut and they don't squish down and get all messy.


OH...WOOPS!  did i forget to say these are DELICIOUS !!!


Sunday, 12 December 2010

0 Healthier Peanut Butter Oatmeal Cookies


just a little "HEALTHY"...

and a bunch of  good-for-ya "DELICIOUS"...

sometimes "healthy" and "delicious" don't fit in the same sentence.  these little pea-nutty, oatie, cranberry nuggets are just right...breakfast, snack, late nibble...whenever.  
they're just not as dangerous as the full-phat version...sure peanut butter is full of fat, and brown sugar really isn't better for you than white sugar...but the oats are there to make you feel good about it...right?...

COME ON...YOU'RE EATING FRUIT AND NUTS, OATS AND FLAX.

it's like a P B & J packed with good-for-ya OATS and FLAX.  you have to feel a little righteous nibbling on a cookie that you know won't kill ya if you happen to have more than a few.


SEMI HEALTHY PEANUT BUTTER OATMEAL COOKIES
check out the original recipe with comments at Taste of Home by Marilyn Blankshien
adapted with a few extra goodies

preheat oven to 350 degrees

1/2 cup chunky peanut butter
1/2 cup packed brown sugar
1 egg
1 tsp vanilla
1 and 1/4 cups quick oats
1/2 teaspoon baking soda
1 Tbsp flax seed
dash of cinnamon
1/2 cup dried cranberries

NOTE...some said they weren't sweet enough, so go ahead....taste your dough or bake one and check it out.  remember....it's supposed to be a little healthy!

in a small bowl, cream peanut butter and brown sugar until fluffy.  beat in the egg and vanilla.
add the oats, flax, cinnamon and baking soda to the creamed mixture.  mix well.  theow in your cranberries and mix a little more.

drop by large tablespoons 2 in. apart onto greased (or parchment) baking sheets.  flatten slightly... use a fork dipped in flour for the peanut butter cookie effect.  bake at 350 for 6-8 minutes.   remove to wire rack to cool.  store in airtight container.  they keep for quite a while in the fridge in a ziploc.  

Friday, 10 December 2010

0 ON-THE-GO...Breakfast Cookies


a fun way to catch breakfast if you're always in a hurry to get out the door.  these babies are quite tasty and they really DO fill you up.  they have all the right "good-for-you" breakfast ingredients ...

CEREAL, BACON AND EGGS

as you know, i'm always on the hunt for fun breakfast ideas.  i came across this idea while aimlessly googling around and found a site called Mr. Breakfast...which then led me to the original recipe from Jennifer at her blog Cookin' in the 'Cuse.   i knew these sounded right up my alley...being that there is bacon involved... so i took her recipe and added a few more healthy goodies.

ON-THE-GO BREAKFAST COOKIES
slightly adapted form Cookin' in the 'Cuse 

1/2 lb bacon...6-10 strips
1/2 cup butter...i used 5 Tsp butter and 3 Tsp bacon fat
1/4 cup white sugar
1/2 cup soft packed brown sugar
1 egg
1 cup white whole wheat flour...AP flour ok
1/4 tsp baking soda
2 cups multi-grain cereal...i used Fiber One Flakes
1/2 cup dried cranberries
1 Tbsp flax
1/2 tsp cinnamon
1/4 tsp fresh ground nutmeg
1/2 tsp vanilla
1/2 tsp maple extract
Preheat oven to 350 degrees.  Cook bacon until very crisp, drain well (reserve bacon fat if using) and break into 1/2 inch pieces.  Beat together butter, bacon fat (if using) and both sugars till light and fluffy.  Beat in egg and the extracts  Combine flour, cinnamon, nutmeg and baking soda; mix into butter mixture.  Stir in bacon, flax-optional, multi-grain flakes and cranberries. 
Drop by rounded teaspoonfuls onto ungreased cookie sheet.  Space 2 inches apart.  Bake for 15-18 minutes.  Remove to rack to cool--about 2 minutes, then remove from rack.


Sunday, 19 September 2010

0 Alton Brown's Protein Power Bars

AS SEEN ON TV !!!

i'll admit, i was watching Alton late the other night. usually i just can't wrap my head around some of the stuff he makes. does anyone remember the deep fried turkey episode?...where he rigged up this whole elaborate ladder pulley system to safely drop the turkey into the vat of hot oil? he just goes a bit overboard on his explanation and method of cooking things that really needn't be so involved. BUT, this episode on homemade protein bars caught my attention.

i'm always on the hunt for a tasty homemade protein snack and i've tried a quite a few...some (most) are...hmmm...let's just say...AWFUL. i think the worst so far was one i found in a bodybuilding forum comprised of raw oats, protein powder, peanut butter and egg whites. the end result was something like particle board.
i'm happy to report that this one is actually tasty. it's moist, satisfying, filling, sweet, a little crunchy, keeps well and is a handy, healthy snack for anytime of the day. i tried a few out on my friends and they too were amazed that this handy, sweet snack bar was actually good for you.

so...i've copied the recipe exactly for you below so you can check out the ingredients. the list is looooonnngg. i thought is sounded a bit involved, like everything he does, but i found the ingredients interesting...i never would have thought to add a whole block of tofu in for protein AND moisture.
you can find the original recipe HERE at Foodnetwork.com for a printable version

Alton Brown's Protein Bars 2005

Ingredients
4 ounces soy protein powder, approximately 1 cup..i used vanilla whey protein powder
2 1/4 ounces oat bran, approximately 1/2 cup
2 3/4 ounces whole-wheat flour, approximately 1/2 cup
3/4-ounce wheat germ, approximately 1/4 cup
1/2 teaspoon kosher salt
3 ounces raisins, approximately 1/2 cup
2 1/2 ounces dried cherries, approximately 1/2 cup
3 ounces dried blueberries, approximately 1/2 cup

2 1/2 ounces dried apricots, approximately 1/2 cup
1 (12.3-ounce) package soft silken tofu
1/2 cup unfiltered apple juice
4 ounces dark brown sugar, approximately 1/2 cup packed
2 large whole eggs, beaten
2/3 cup natural peanut butter
Canola oil, for pan

NOTE...i used used 1 1/2 cup total of dried blueberries, diced-dried apricots and approx 1/4 cup crystallized ginger, diced
AND 2 Tsp. flax seeds

Directions
Line the bottom of a 13 by 9-inch glass baking dish with parchment paper and lightly coat with canola oil. Set aside. Preheat the oven to 350 degrees F.

In a large mixing bowl, combine the protein powder, oat bran, wheat flour, wheat germ, and salt. Set aside.

Coarsely chop the raisins, dried cherries, blueberries and apricots and place in a small bowl and set aside.

In a third mixing bowl, whisk the tofu until smooth. Add the apple juice, brown sugar, eggs, and peanut butter, 1 at a time, and whisk to combine after each addition. Add this to the protein powder mixture and stir well to combine. Fold in the dried fruit. Spread evenly in the prepared baking dish and bake in the oven for 35 minutes or until the internal temperature reaches 205 degrees F. Remove from the oven and cool completely before cutting into squares. Cut into squares and store in an airtight container for up to a week.

Thursday, 8 July 2010

0 Scotch Eggs...Not Scottish at all...

SCOTCH EGGS...

not Scottish at all ??? then why are they call Scotch Eggs ?!!! they were actually invented by the famous London department store, FORTNUM & MASON in 1851 and they were originally wrapped in SCOTCH Beef...just a fun little foodie fact i found at Wikipedia.

i don't recall where i first saw these and got the bee in my bonnet, but i knew i had to try them. i'm all about a good full protein breakfast and quite often i have to eat it on the go. these are perfect...and so dang CUTE as well.

so easy to make. i chose the easiest route. basically you cover a hard boiled egg in your favorite sausage, dip that in some breadcrumbs and bake 'till the sausage is done. there are so many variations out there with more involved meat recipes, but why go there when there are so many wonderful fresh handmade sausages at your favorite markets. Bristol Farms has an incredible selection. their Chicken Apple Sausage with chunks of granny smith is so delicious as well as the Chicken Jezebel and Spicy Italian Turkey. my first batch was made with good ol'Jenny-O's Spicy Italian Turkey Sausage found at most major markets. so... fancy sausage or packaged store bought, these are easy, fun, portable, ADORABLE and kids will love them.


i chose to bake these. i'm not a fan of deep frying YET. i like to leave that to the professionals. deep frying scares me a bit and since i don't do alot of it (YET), the oil would be a one time use. seems like a waste. then there's the pain of getting rid of it, not spilling it, letting it cool enough to pour it back into the container you were hopefully smart enough to keep and finally throwing away some perfectly good frying oil. i must admit, i think i secretly would love to fry more things. i kind of wish i could have a mini fryer in the kitchen. shhhhhhh.

SCOTCH EGGS
loosely adapted from Recipezaar #69970...

Ingredients
1 lb chicken, turkey or pork Italian sausage
4-5 large eggs, hard boiled (not too large)
flour (just a little to coat the eggs)
1 large egg
2 cups fine dry breadcrumbs (i used Panko). you don't need to use the whole 2 cups!!
Directions
1. remove meat from casing. one large sausage should cover 1 egg (a little less than 1/4 lb). use your judgement. i made 5 scotch eggs from a 1lb package of Jenny O Turkey Sausage for the first batch.
2. roll the eggs in flour. (this helps the meat stick to the egg)
3. wrap each egg evenly in a portion of meat, being sure they are covered completely. roll it around in your hands a bit to ensure even sausage coating.
4. beat the remaining egg in a small bowl
5. dip each egg/sausage ball in the beaten egg then coat thoroughly in breadcrumbs.
6. optional...chill for one hour...or don't...i didn't.
7. bake until golden brown on a cookie sheet (line with tin foil for easy clean up) at 375°F; about 30 minutes. mine took about 35 minutes.
these keep really well in the fridge for a few days. just warm in the microwave. i like to slice in half and eat like an apple...on the go. of course, you could fancy these up for a fun brunch treat. they make for such a cute presentation with the surprise egg inside.

Tuesday, 29 June 2010

0 Pork Rillettes

PORK RILLETTES

pork belly, pork shoulder, rosemary and duck fat.

finally i think i have conquered the Rillette. for a long time i was fascinated by them , but a little intimidated. meat swimming in it's own FAT and topped with more FAT...how can this be a good thing?... i also thought they might be too involved and too much to take on. not so. when you break it down in layman's terms they are just fancy flavored potted meats topped with duck fat, pork belly fat, clarified butter or a tasty combo of fats.

my first attempt was the pork rillette, for a couple of reasons...I LOVE PORK and the mention of pork belly sold me...also pork is usually inexpensive. i think i spent less than $10.00 for the whole thing. for a first try with a Charcuterie recipe i think i did pretty good. now i'm hooked. the best part is that they keep in the fridge for weeks if sealed properly and make a great impression on drop-by guests, a tasty late night snack or a great addition to any party.
as i mentioned i was fascinated by the "Rillette" for quite a while so i googled around a lot of blogs, websites and thumbed through most of the books i had. came across loads of different techniques and all sorts of flavors. i settled on the something basic and a recipe that wouldn't require a lot of ingredients. pork is cheap, i had duck fat in the fridge and rosemary in the garden...done....i did, however, have to go out and buy the cute little French jars. they cost more than the whole recipe.

PORK RILLETTES

adapted from many recipes, but one in particular had good easy instructions found at a great blog called Eat me Drink Me. i have copied his instructions, but added my recipe ingredients below.

Ingredients i used

1.5 lbs pork shoulder

1.75 lbs pork belly

7 smashed cloves garlic

3 large sprigs fresh rosemary

2 sprigs thyme

2 tsp oregano

2 bay leaves

1 oz veal demi glace (optional)

2-3 cups water

2/3 cup duck fat (not necessary, but good)

Instructions
Cut the rind off the belly. In a Dutch oven, or oven proof pot, combine the pork with rosemary (I used 3 large sprigs), crushed cloves of garlic, and bay leaves and season generously with salt, black pepper and nutmeg - most recipes call for a bouquet garni, not just rosemary, or thyme and parsley instead. But hell. Here's to living dangerously, eh?

Cover with a cup full of water, and bring to a low simmer on the stove. Not quite bubbling. Meanwhile, preheat the oven to gas mark 2. Cover, and place in the heated oven. Read a book. Watch TV. Call you friends. Cooking times vary from 2 to 6 hours. Bake bread to go with your rillette. I cooked by eye, as it were, taking the pot out of the oven every 40 minutes or so, stirring to make sure it didn't stick, and eventually, forking the thicker parts of meat apart to allow it to cook a little more quickly.

The fat should largely melt to a clear liquid, and the pork cook until meltingly soft - it should fall apart in the pot when gently forked. When that happens, drain and reserve the liquid. Discard the herbs, and allow the pork to cool enough to handle. Best to keep it a little warm though. With your hands, or two forks, shred the meat into, depending on your taste, pistachio sized piece, or small threads of pork. Or less even. Taste the pork, and add herbs, salt, pepper - whatever you used originally - to taste. Place in a terrine dish (no grease or bacon required. Any more pork might actually kill you) or a regular bowl, or container, and compress. For ten minutes, or two hours. Again, your preference is, I think, prime, though I only loosely compressed it, and the dish soaked up huge amounts of fat.

Finally, pour over some of the reserved fat to form a thin layer of fat on top of the crock, terrine dish, bowl.....and leave covered, in the fridge, for three days. It can keep for ten days without the fat covering, and longer with.

Eat, with pickled cornichons, or black olives, on bread. To serve, take what you want from the terrine. Allow to come to room temperature, and serve.


Friday, 28 May 2010

0 Potted Meat...Homemade "Almost Pate"

Potted Meat...the poor mans Pate ...?

easy to make and really does taste like a rich pate, but without the Liver Factor. pack it into cute little jars for a fun, gourmet lunch treat or mold it in a terrine and slice for sandwiches and salad topping. if you're the canning type you could top it off with a little rendered fat or some clarified butter. actually it's not necessary to go through the whole canning process. if you seal the top with some type of fat, it will last in the fridge for quite a few weeks just like it's fancy French cousin "The Rillette".

the basic concept is...well cooked(boiled even) meat, seasoned, pureed and stored/packed in it's own juices. pates, of course, are a bit more complex, but this i found to be quite easy...maybe not as sophisticated, but so much easier to make and, again, no liver is involved...not that i have a problem with liver. it's one of the things with which i haven't had any experience. a while back i had a small nibble of a chicken liver and reeeeally wasn't pleased with the flavor or the lingering taste. i do, however, love braunschweiger and "real pate"...go figure. i just don't think i'm ready to cook with it yet...and as i said, it's absolutely NOT necessary for Potted Meat.

served as a spread or sliced from a terrine this is a great versatile meat course...appetizer, sandwich, snack or on a salad. i really enjoyed it in a lettuce wrap with a cornichon and a little dijon.

easy instructions...

1 lb of ground veal (lamb or pork would work well)

1/2 diced onion

good stock...i had some oxtail stock. enough to cover the meat. approx 4-5 cups. use something that pairs well with the meat you choose. real stock(not canned or cubed) seems to set-up better because of the gelatinous effect when chilled.

2 Tbsp olive oil

1 tsp oregano

1 tsp tarragon

bone marrow-OPTIONAL. i happen to have some.

bring this to a boil and then simmer for 2 hours. check to see that your liquid has not reduced below the meat.

remove from heat and strain. keep liquid.

put meat in a processor with...

1-2 tsp fresh minced rosemary

3-4 roasted garlic cloves-i always have some on hand.

1/4 cup minced parsley

S & P to taste

pulse process and add cooking liqiuid to desired consistancy. don't separate out the fat. you'll need this to help set-up the cooled finished product. i think it should be smooth, but not too creamy. spoon into vessel of your choice. if using jars you can have fun layering in other components as shown in picture above. if using a terrine...line it with foil or saran wrap and sprinkle chopped parsley on the bottom and sides. this will make for easy removal and nice presentation.

Thursday, 21 January 2010

0 GINGER ORANGE IMPOSSIBLE CUSTARD SQUARES


GUILT FREE CUSTARD...yes...still working off the holiday sugar rush? i know i am, so here's one of my staples i love to have in the fridge for a quick guilt free yummy.

side note...whew, geeeez..i'm so behind with my posts, darn it... i've got 10 drafts all lined up and waiting. i'm quick on the cook and shoot, but a bit slow on the ol' pen to paper. i'm a snail when it comes to getting it all together to actually post for all to see...all 3 of you. just kidding...i love all your support and interest in my funny little food world. all your comments really make my day. it's so exciting to see a new comment and or a new friend pop up.

so on with the new item before i get all gushie or something....

most of you have heard of Impossible pies...if you haven't, they are pies with no crust. the crust is kind of formed by the flour or Bisquick that falls to the bottom while baking. at least that's what i think happens. i found a good site called Ellen's Kitchen that explains it a little and it has loads of fun impossible pies to make. as you'll see, you can just about add anything you want to the basic recipe idea and you'll create your own impossible pie.


this one turned out killer tasty good. i simply added a bit of fresh grated ginger and a bit of orange zest, poured it all into a square baking dish instead of a pie plate and VOILA...Ginger Orange Custard Squares...happy, happy, and more HAPPY !!!


i don't quite remember how i came across this exact recipe, but this is the one i use as a base. i have put my changes and additions in italics and bold. my recipe is chock full o' protein and is very low carb so it's a really delicious and satisfying treat any time of the day.

BLENDER CUSTARD PIE
(*** denotes important changes)

1/2 cup sugar (1/2 cup cooking splenda)
1 teaspoon vanilla
4 eggs
2 cups of milk (1 cup whole and 1 cup nonfat)
1/2 cup bisquick (i use 1/4 cup whole wheat flour and 1/4 cup almond flour)

***i add 1/2 cup lowfat cottage cheese
and 1 scoop vanilla whey protein powder

***for this particular pie i used approx 1/2 Tbsp fresh grated ginger and 1/2 Tbsp orange zest

Put all the above ingredients in blender except the bisquick.
***i use an immersion blender. definitely the best tool for the job
Blend at low speed for 1 minute. (i like to blend the eggs, cottage cheese and 1 cup of milk in first. make sure the cottage cheese is WELL blended, you don't want any chunks AT ALL)
Add the bisquick, blend for 4 minutes.
Pour all ingredients into a greased 11 inch pie plate. (i usually use a glass pie plate, but this time i wanted squares so i went with the 2 qt.(8 or 9 inch) square pyrex...i like glass so i can see that the bottom is not browning.)
Bake at 350 degrees for 40-45 minutes, insert a knife, it comes out clean the pie is done.
Sprinkle with nutmeg.
You can also add coconut to the above ingredients before baking.

as far as coconut pies go, you can see my 1/2 healthy coconut blender pie version i made here and have since made it again with the changes you see above....i've also made chocolate custard pie, maple custard, lemon, almond and so on and on and on....the flavors are limitless.

give the IMPOSSIBLE A TRY!!!!...next week i'm trying the dinner Taco Impossible Pie a try...

 
back to top //PART 2